


Faux wood blinds are one of the most popular window treatments for Florida homeowners, and for good reason. They’re moisture-resistant, durable, and look great in just about any room. But once your blinds arrive, you’re left staring at a box of parts and wondering how to install faux wood blinds without putting holes in the wrong spot. The good news? With the right tools and a clear plan, this is a project most people can handle in under an hour per window.
At The Shutter Look, we’ve spent over 23 years installing window treatments across Central Florida, shutters, shades, and yes, blinds of every type. We’ve seen what happens when brackets are mounted crooked, valances are left off, or measurements get fudged. Proper installation matters because it affects how your blinds operate, how long they last, and how they look from both inside and outside your home.
This guide walks you through the full process step by step, from choosing between an inside and outside mount, to securing your brackets, hanging the headrail, and attaching the valance. Whether you’re tackling this yourself or just want to understand what’s involved before booking a free in-home estimate with our team, you’ll have everything you need to get it right the first time.
Tools, parts, and prep
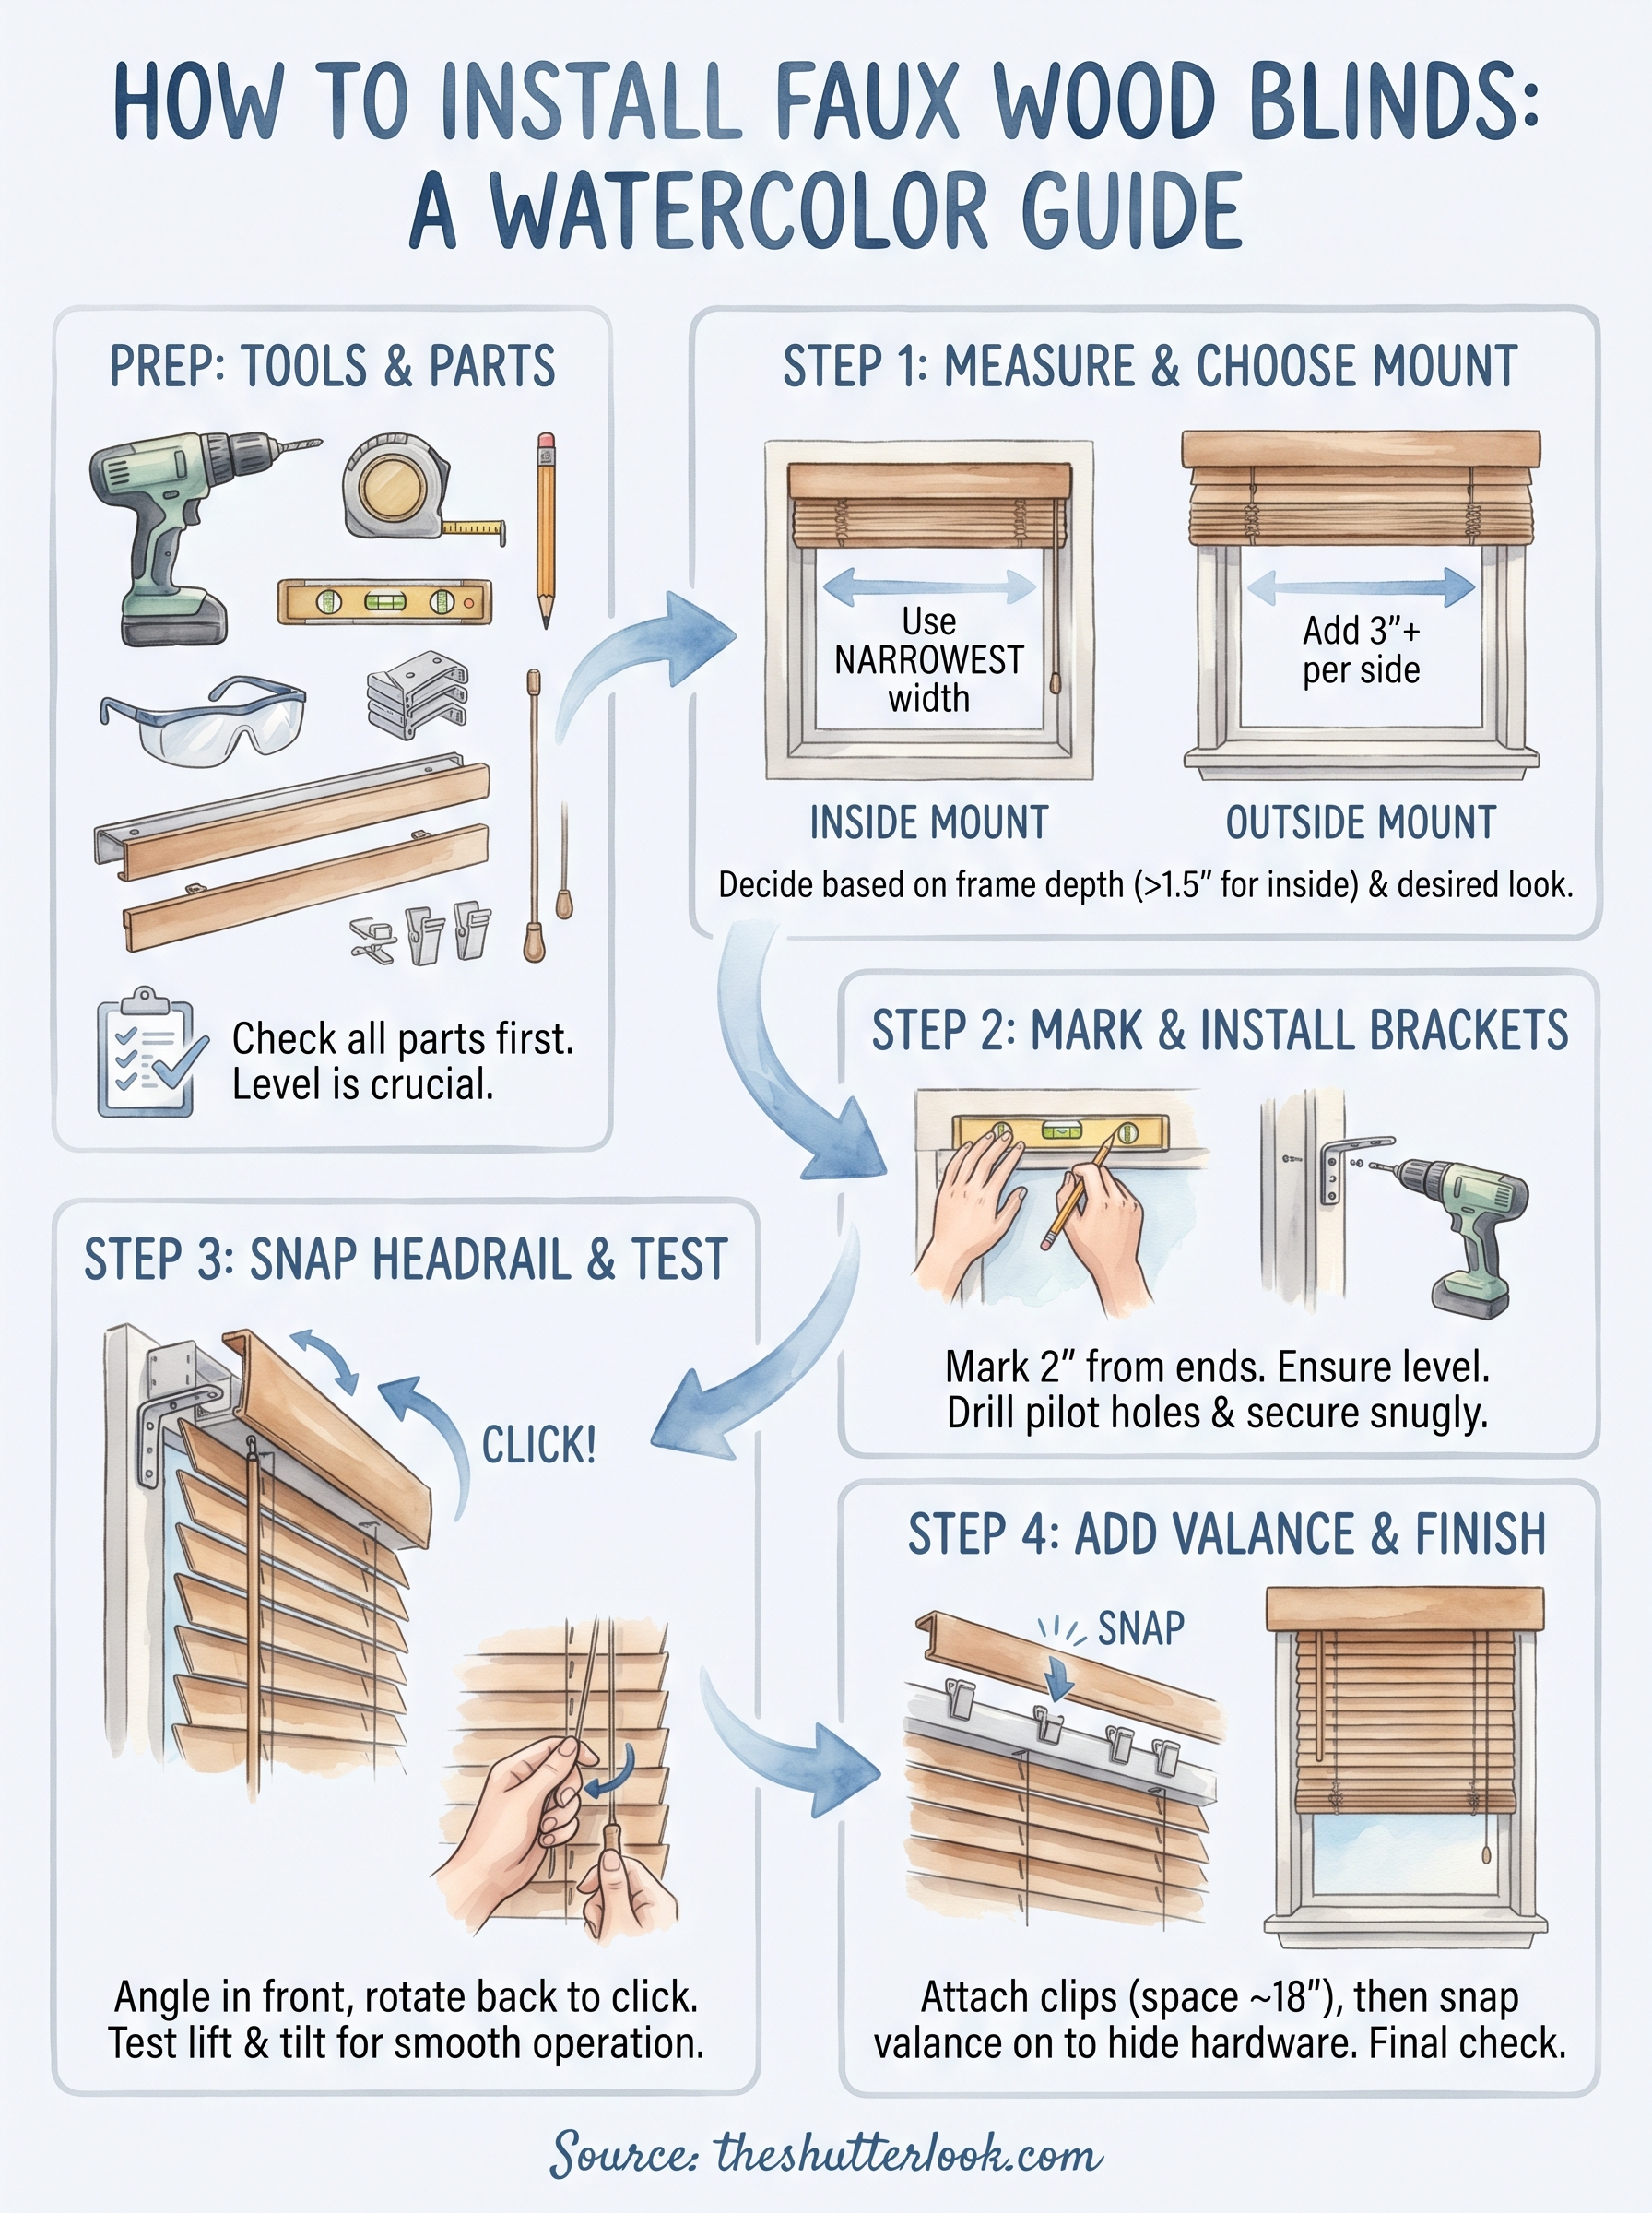
Before you touch a drill or pencil, getting organized saves time and prevents costly mistakes. Most installation errors come from a missing tool or a skipped parts check, not from a complicated process. Lay everything out on a flat surface so you know what you’re working with before you start drilling anything.
Tools to have on hand
Having the right tools ready means you won’t stop mid-install to hunt through a junk drawer. A cordless drill with a Phillips-head bit handles the heavy lifting for most faux wood blind installs. For standard window installations, you’ll also need:
- Tape measure (metal, not fabric)
- Pencil for marking bracket positions
- Small torpedo level
- Safety glasses
- Step stool or ladder for higher windows
- Flat-head screwdriver for tightening valance clips
A level is not optional. Brackets mounted even slightly off will cause your blinds to hang crooked and the slats won’t tilt evenly across the window.
Parts inside the box
Every faux wood blind set ships with the same core components, but manufacturers occasionally leave out a bracket or include the wrong valance clip size. Before you learn how to install faux wood blinds, open the box and lay each part out so you can spot anything missing. A quick check now saves a trip to the hardware store halfway through the job.
Here’s what a standard kit includes:
| Part | What it does |
|---|---|
| Headrail | Houses the tilt rod and lift cords |
| Mounting brackets (usually 2-3) | Attach to the window frame or wall |
| Valance | Covers the headrail for a clean finish |
| Valance clips | Snap the valance onto the headrail |
| Cord or wand | Controls tilt and raises the blinds |
Step 1. Measure and choose your mount
Before you drill a single hole, you need two numbers: the exact width and height of your window opening, and a clear decision on mount type. This first step is where most mistakes happen when learning how to install faux wood blinds, so write everything down before moving forward.
Inside mount vs. outside mount
Your mount choice determines where your brackets go and how your blinds look once they’re hanging. An inside mount fits the headrail inside the window frame for a clean, recessed appearance, but it requires at least 1.5 inches of frame depth for the brackets to clear properly. An outside mount positions the brackets on the wall or trim surrounding the window, which works well for shallow frames or any window where you want to visually increase the perceived size of the opening.
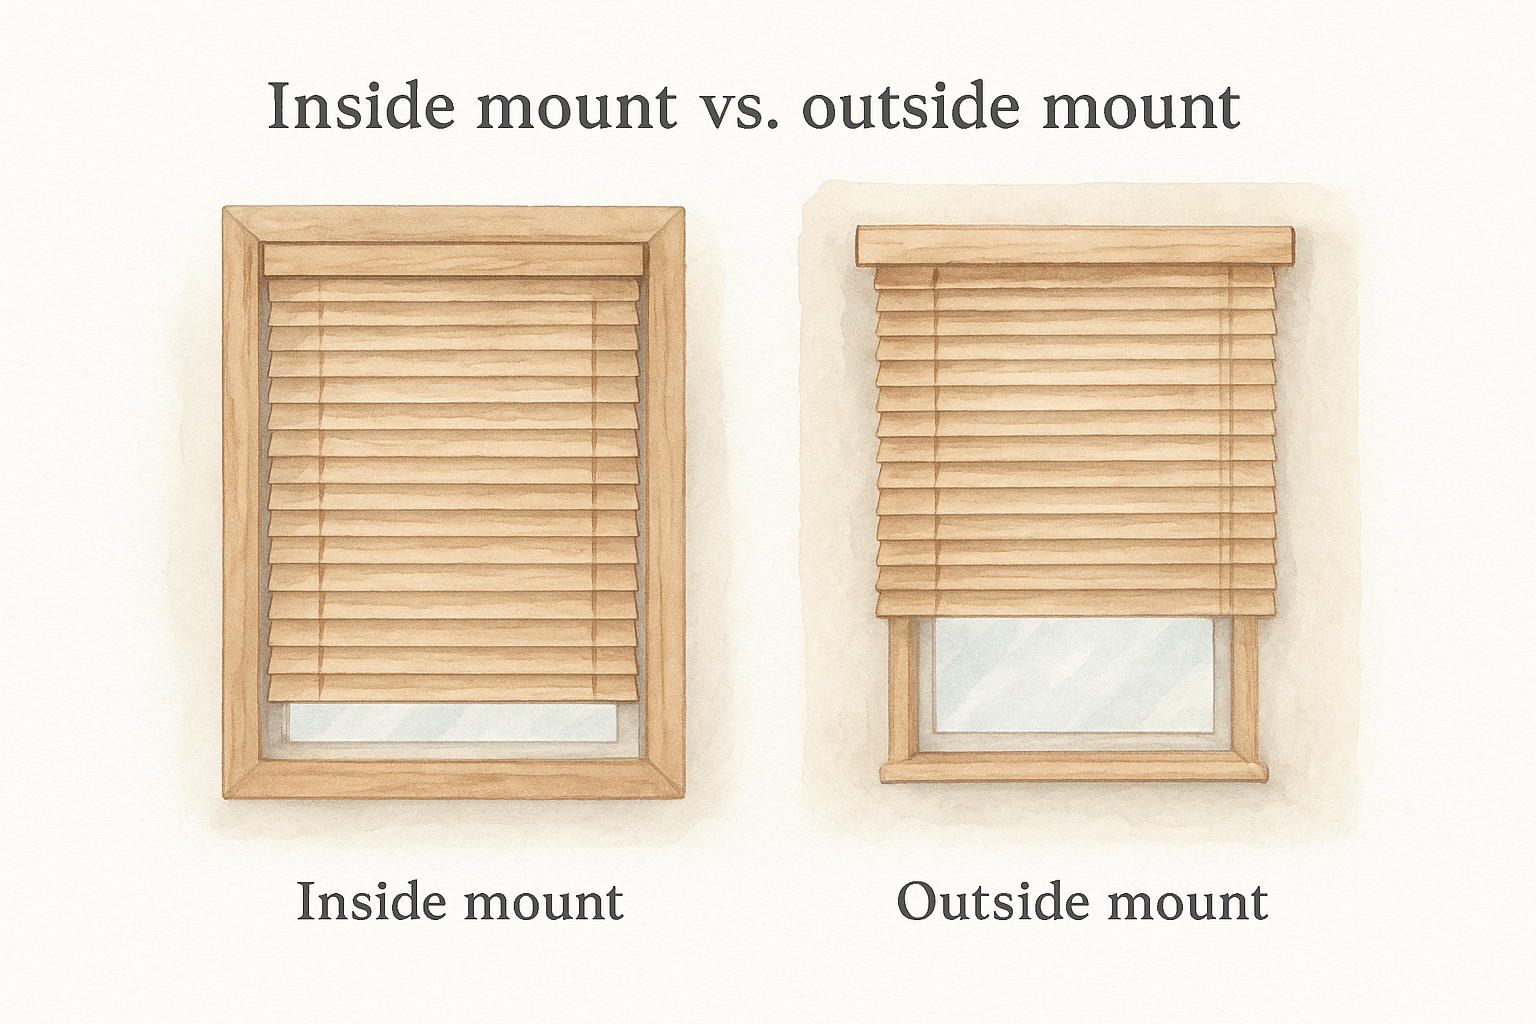
If your window frame is shallower than 1.5 inches, choose an outside mount to avoid clearance problems with the headrail.
| Mount type | Best for | Bracket position |
|---|---|---|
| Inside | Deep frames, built-in look | Inside window frame |
| Outside | Shallow frames, larger appearance | Wall or trim above window |
How to take the measurement
Measure the width at three spots: the top, middle, and bottom of the window opening. Use the narrowest number for an inside mount to ensure the blinds fit without forcing. For an outside mount, add at least 3 inches on each side beyond the frame. Measure the height from the top of the frame down to the sill for an inside mount, or from your chosen headrail position down to where you want the blinds to end.
Step 2. Mark and install the brackets
With your measurements in hand, marking bracket positions accurately is the most important step in learning how to install faux wood blinds. A misplaced bracket causes the headrail to sit crooked, which makes the slats tilt unevenly every time you use them.
How to mark bracket positions
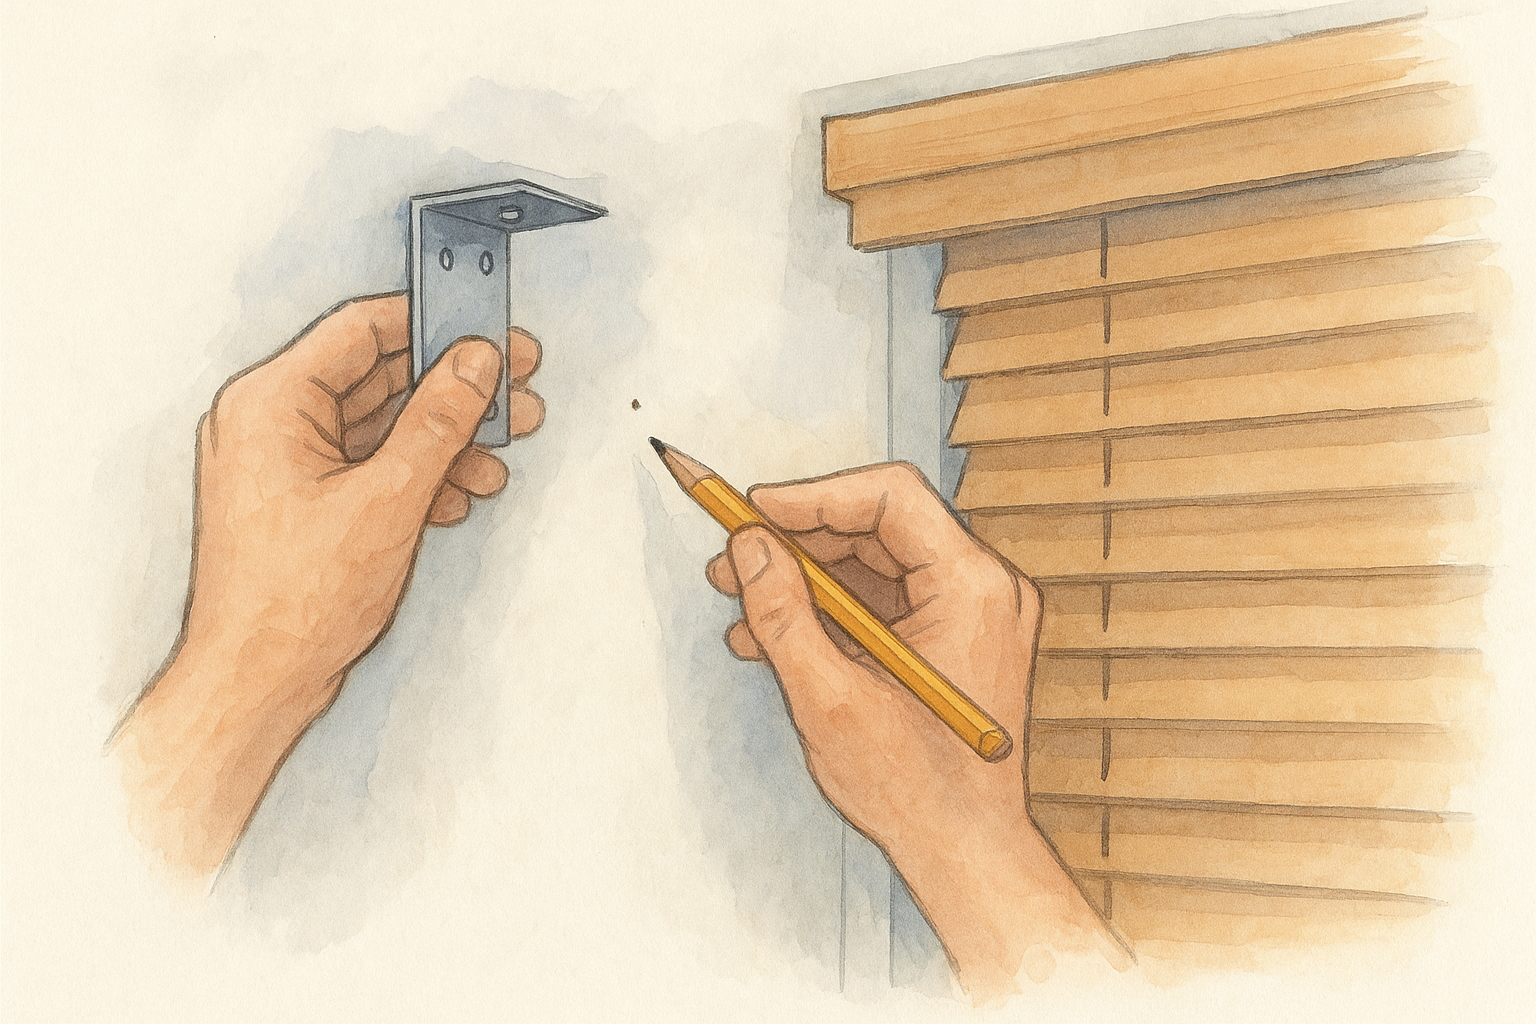
Place one bracket roughly 2 inches in from each end of the headrail. For any blind wider than 36 inches, add a third bracket centered between the two outer ones. Hold each bracket against the frame, then mark every screw hole with a sharp pencil before you drill.
| Blind width | Brackets needed |
|---|---|
| Up to 36" | 2 |
| 37" to 72" | 3 |
| Over 72" | 4 or more |
Check each mark with your level before drilling. One degree of tilt at this stage throws off the entire install.
Drilling and securing the brackets
Drill a pilot hole at each pencil mark to keep the frame from splitting. Press each bracket flat against the surface and drive the screws in until snug, but stop before overtightening them.
For drywall installs without a stud behind the frame, use wall anchors rated for at least 10 lbs per bracket. This prevents the headrail from pulling away from the wall over time.
Step 3. Snap in the headrail and test
With your brackets locked in place, sliding the headrail into position is the quickest mechanical step in learning how to install faux wood blinds. Hold the headrail at a slight angle, hook the front lip into the bracket’s front channel first, then rotate it back until you hear a firm click on each bracket.
Seating the headrail correctly
Lift the headrail up to the brackets and align it with the front channel on each one before pushing. Work from one end to the other rather than pressing the middle first, which can bow the rail and make the end brackets harder to close. Confirm every bracket latch is fully closed by pressing down on the headrail at each bracket point before releasing your grip.
If any bracket latch doesn’t click shut, check that the headrail is fully seated in the front channel before forcing the latch cover closed.
Testing before you finish
Pull the lift cord slowly to raise the blinds halfway, then lower them fully. Watch for uneven stacking or cords that bind against the headrail. Next, rotate the tilt wand a full turn in each direction to confirm every slat opens and closes without catching on the one beside it.
Step 4. Add the valance and finish
The valance snaps onto the headrail to hide the brackets and hardware. Skipping this step leaves the mechanical parts exposed and ruins the clean finish that makes faux wood blinds worth the effort.
Attaching the valance clips
Your kit includes plastic valance clips that hook over the front and bottom edges of the headrail. Slide one clip near each end and, for blinds wider than 36 inches, add a third in the center.
Space your clips no more than 18 inches apart to prevent the valance from bowing outward over time.
Once the clips are set, press the valance firmly against them from the top edge down until each clip snaps into the groove on the back of the valance.
Final walkthrough
Before you step off the ladder, raise and lower your blinds two or three times to confirm everything moves smoothly. Check that the valance sits level and flush with no gaps at the corners.
Run through these four points before calling the job complete:
- Headrail latches: all bracket clips fully closed
- Valance: flat with no gaps at corners
- Lift cord: raises and lowers without binding
- Tilt wand: rotates smoothly in both directions
Learning how to install faux wood blinds the right way means finishing with the hardware in place.
Next steps
Now that you know how to install faux wood blinds from bracket placement to valance attachment, you’re ready to put that knowledge to work. Every step in this guide builds on the one before it, so if you run into trouble, go back to your measurements first. A remeasure catches most problems before they turn into a full reinstall.
Faux wood blinds are only one option for Central Florida homes. Shutters, roller shades, and motorized treatments all offer different benefits depending on your room’s light needs and privacy requirements. If you want a professional opinion before you commit to any product, The Shutter Look offers free in-home estimates with physical samples so you can see exactly what you’re buying before anything gets ordered. Book a free in-home estimate and our team will handle the measurements, the recommendation, and the installation for you from start to finish.
