


Roller shades pick up more dust, grease, and grime than most people realize. Over time, that buildup dulls the fabric or vinyl, makes the shades look older than they are, and can even trigger allergies. Knowing how to clean roller shades the right way matters because the wrong method, harsh chemicals, too much water, aggressive scrubbing, can warp vinyl or leave permanent stains on fabric.
At The Shutter Look, we’ve spent over 23 years installing roller shades across Central Florida homes. Our customers regularly ask us how to keep their shades looking fresh between appointments, and the answer depends entirely on what material you’re working with and how dirty it actually is. We’ve seen plenty of well-intentioned cleaning attempts go wrong, so we put this guide together from hands-on experience.
Below, you’ll find clear steps for dusting, spot cleaning, and deep cleaning roller shades, whether yours are vinyl, fabric, or solar material. We’ll cover which cleaning products are safe, which ones to avoid, and how to handle stubborn stains without causing damage. By the end, you’ll have a straightforward routine that keeps your roller shades in great shape for years.
What to know before you start
Before you touch your roller shades with any cleaner, take a moment to assess what you’re working with. Roller shade materials react very differently to water, heat, and cleaning products, so the method that works perfectly on vinyl can permanently damage a woven fabric. Taking five minutes to identify your shade type is the single most important step in the whole process.
Skipping the material check is the most common mistake homeowners make when learning how to clean roller shades, and it’s also the easiest to avoid.
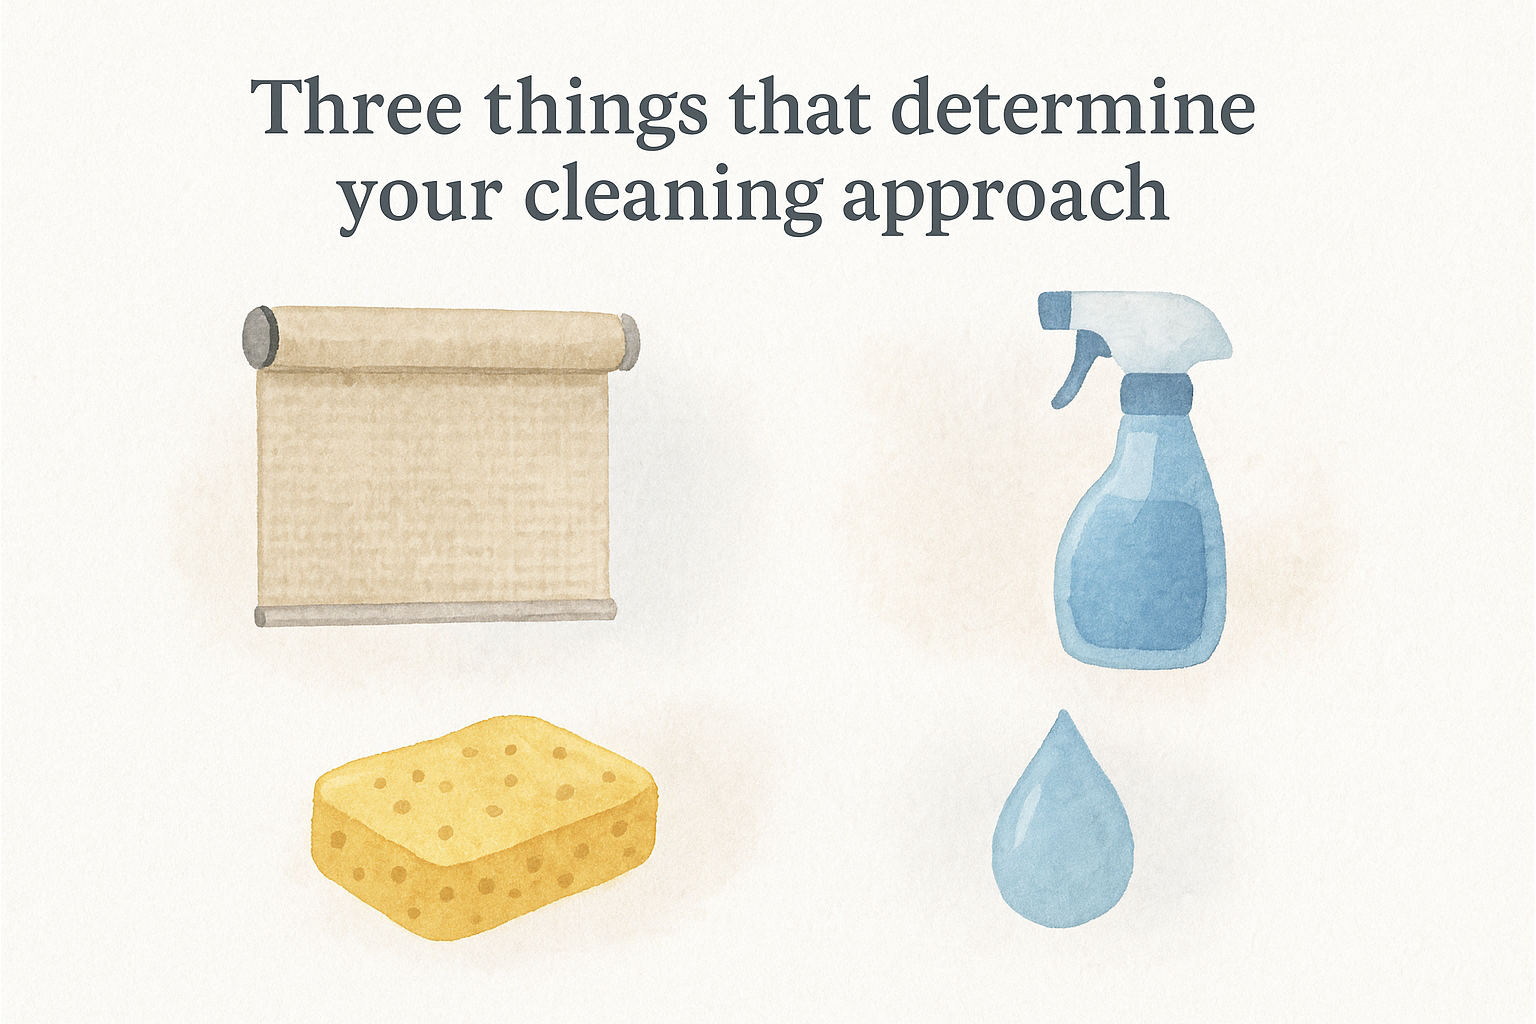
Three things that determine your cleaning approach
Your shade material, the type of finish, and the nature of the stain all shape which cleaning method to use. The table below shows the three most common roller shade types and how much water each can handle:
| Shade Type | Material | Water Tolerance |
|---|---|---|
| Vinyl/PVC | Synthetic film | High |
| Fabric | Woven textile | Low to medium |
| Solar/screen | Open weave mesh | Medium |
Blackout shades often have a backing layer that can peel or warp with too much moisture, so check whether your shade has one before you apply any liquid.
Products to avoid before you pick up a cloth
Harsh chemicals and abrasive tools ruin roller shades faster than dirt ever will. Keep all of these away from your shades:
- Bleach or bleach-based sprays
- Ammonia-based glass cleaners
- Stiff-bristle brushes or scrubbing pads
- Steam cleaners applied directly to the material
Mild dish soap diluted in lukewarm water is your safest starting point for most shade types. Always test any solution on a small, hidden corner first and let it fully dry before moving on to the rest of the shade.
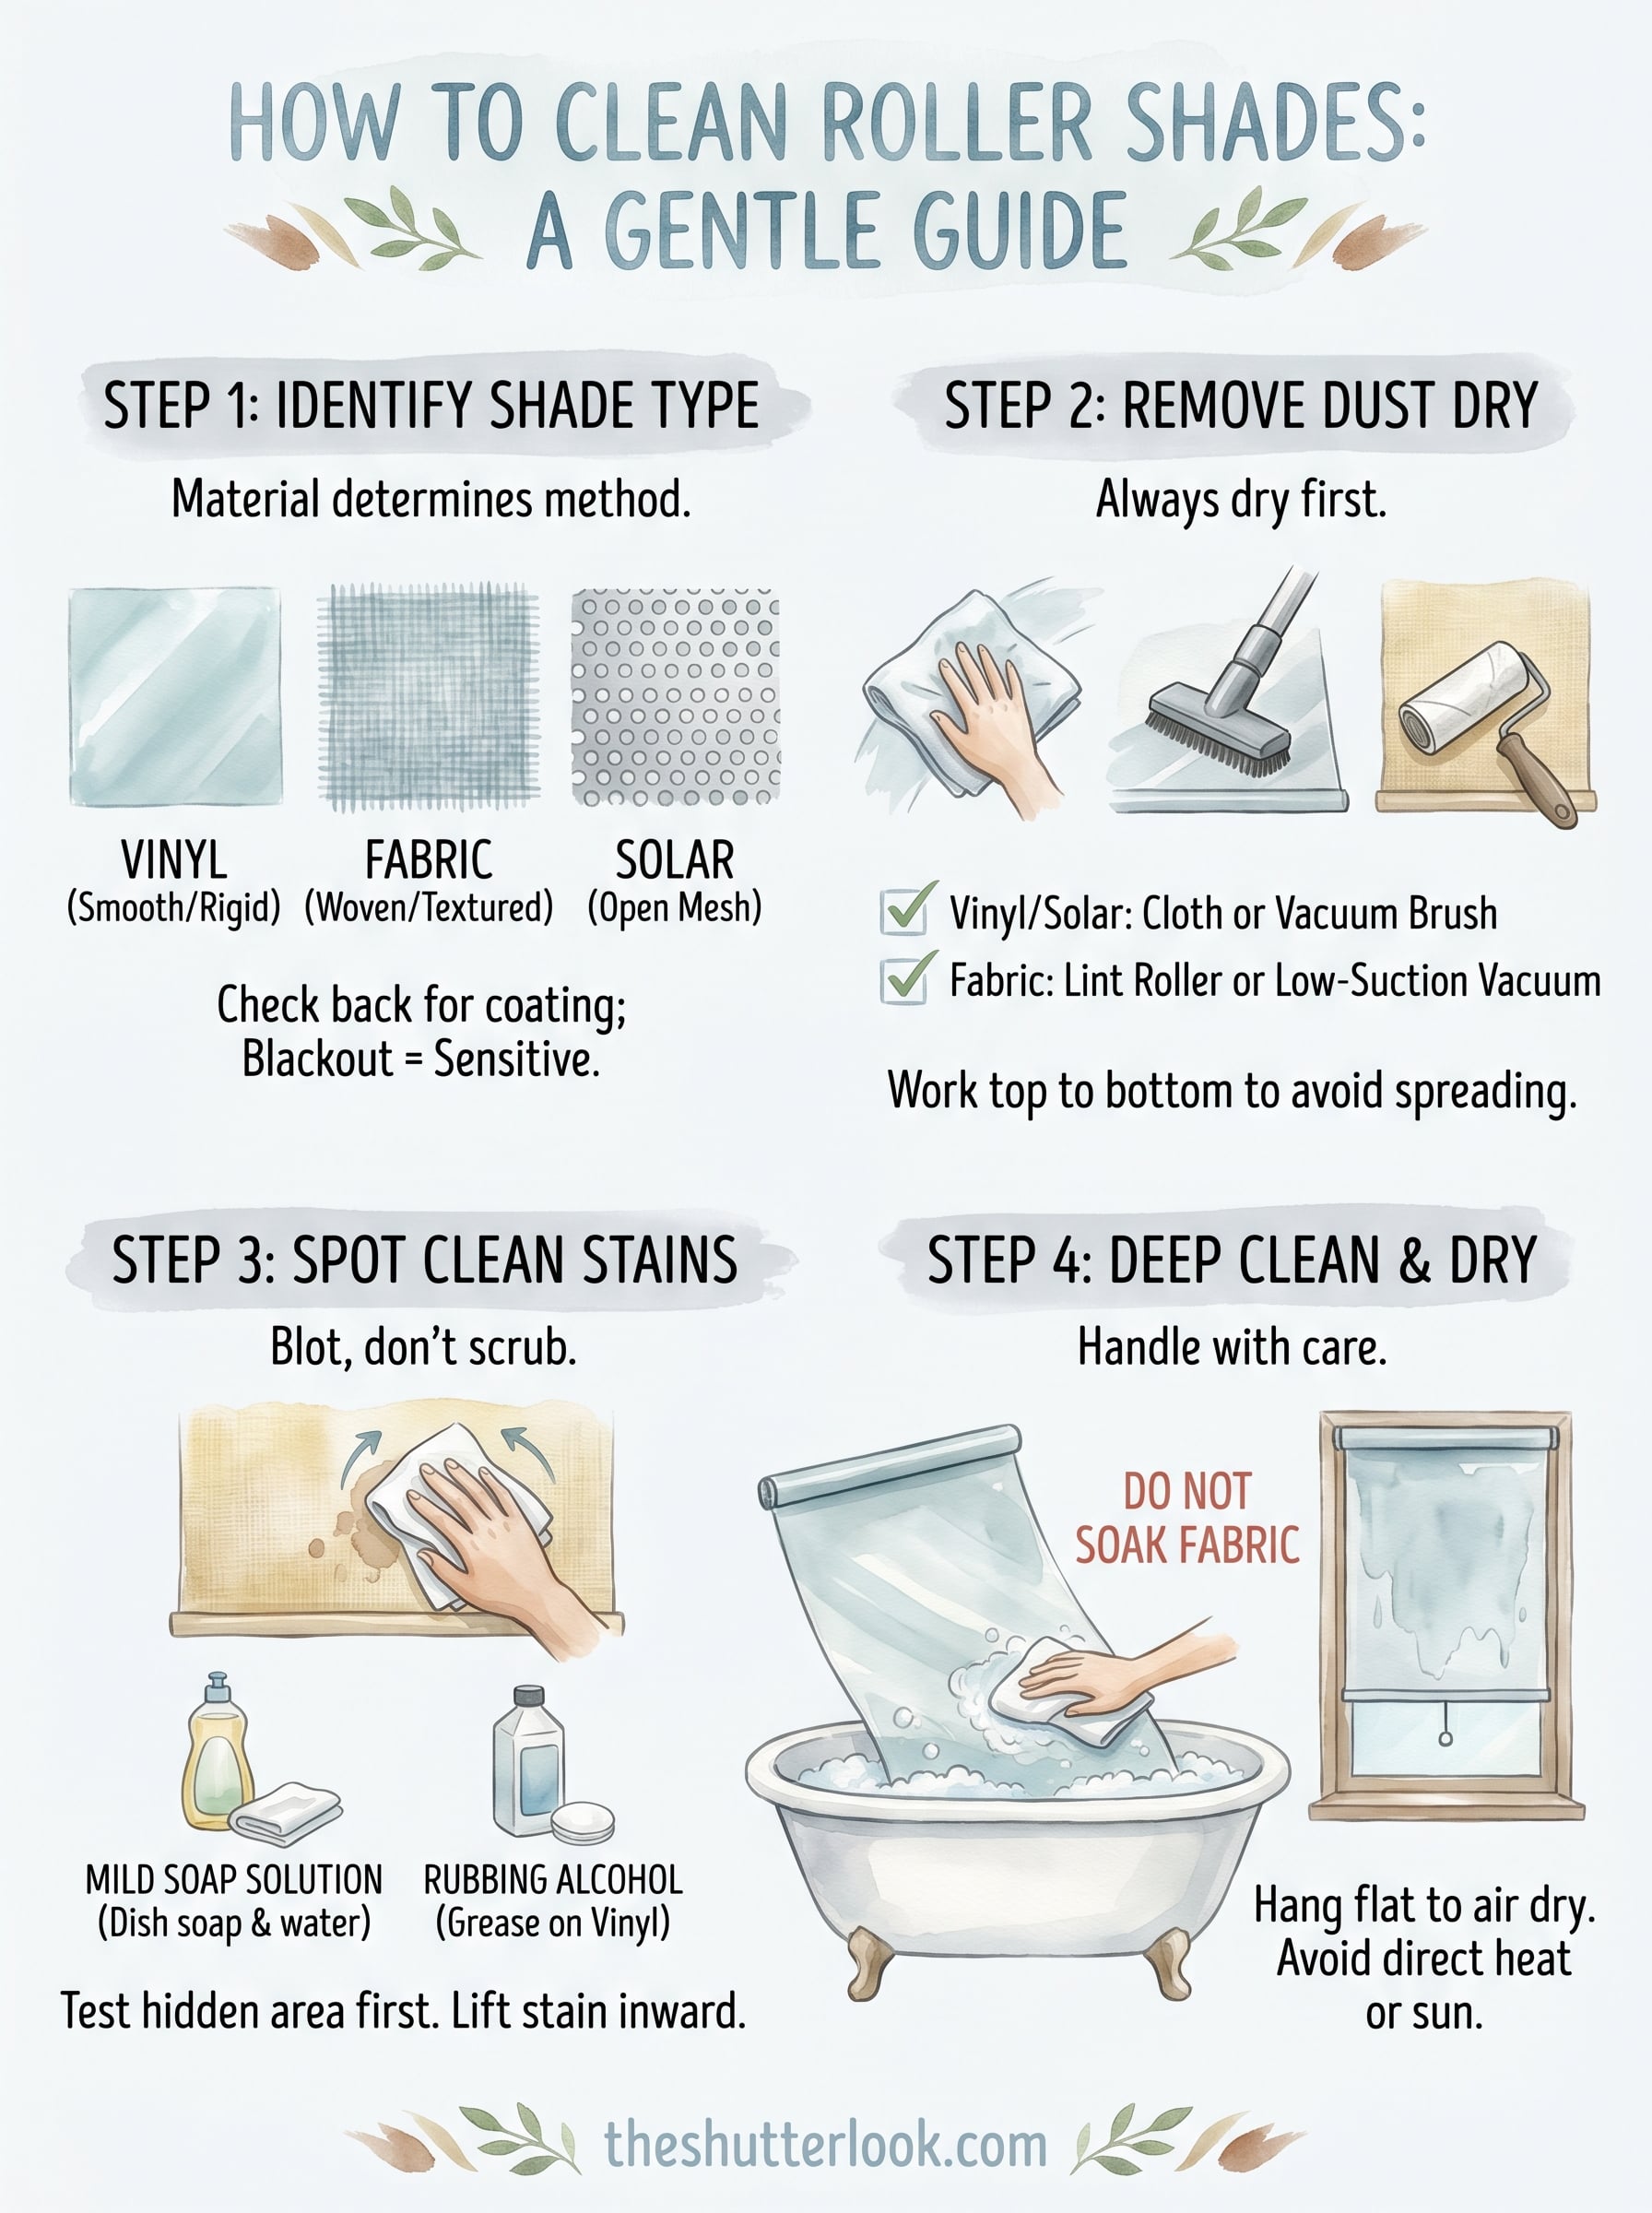
Step 1. Identify your roller shade type and finish
Pull one shade down fully and look at it closely. The material and finish determine every cleaning decision you’ll make, so this step sets the entire process up correctly. Run your fingers across the surface. Vinyl feels smooth and slightly rigid, while fabric has a visible weave texture. Solar shades have an open mesh pattern you can see daylight pass through.
How to confirm what you have
Flip the shade over and check the back. Blackout shades have a solid white or grey backing layer, and that layer is especially vulnerable to moisture damage. If you see any coating on the back, treat the shade as fabric-sensitive regardless of what the front looks or feels like.
Check your original paperwork or the shade’s end cap for a manufacturer label with care instructions. If you no longer have that documentation, contact the retailer or search the brand name online. Some manufacturers also post care guides directly on their websites. Knowing the exact material before you start is the fastest way to learn how to clean roller shades without causing damage you simply cannot reverse.
If you’re unsure about the material, always default to the gentlest cleaning method first.
Step 2. Remove dust and debris the safe way
Dust is the most common problem people face when learning how to clean roller shades, and it’s the easiest to solve when you use the right approach. Always start with dry removal before introducing any liquid to the shade surface. Applying water or a cleaning solution over loose dust pushes particles deeper into the fabric or vinyl, which turns a simple dusting job into a stubborn stain problem.
Always complete the dry removal step before you reach for any cleaning solution.
The right tools for dust removal
Your choice of tool directly affects the outcome. A soft microfiber cloth or a low-suction vacuum with a brush attachment handles vinyl and solar shades without scratching the surface. For fabric shades, a handheld vacuum on its lowest setting or a clean lint roller lifts surface debris without disturbing the weave or pulling threads loose.
Here’s a quick reference for which tool to use on each shade type:
| Shade Type | Recommended Tool |
|---|---|
| Vinyl/PVC | Microfiber cloth or vacuum with brush attachment |
| Fabric | Lint roller or vacuum on lowest setting |
| Solar/screen | Vacuum with brush attachment or soft-bristle brush |
Work from top to bottom in slow, even strokes so you don’t redistribute dust onto areas you’ve already finished. Repeat this step weekly on high-traffic windows to prevent buildup from hardening over time.
Step 3. Spot clean stains without spreading them
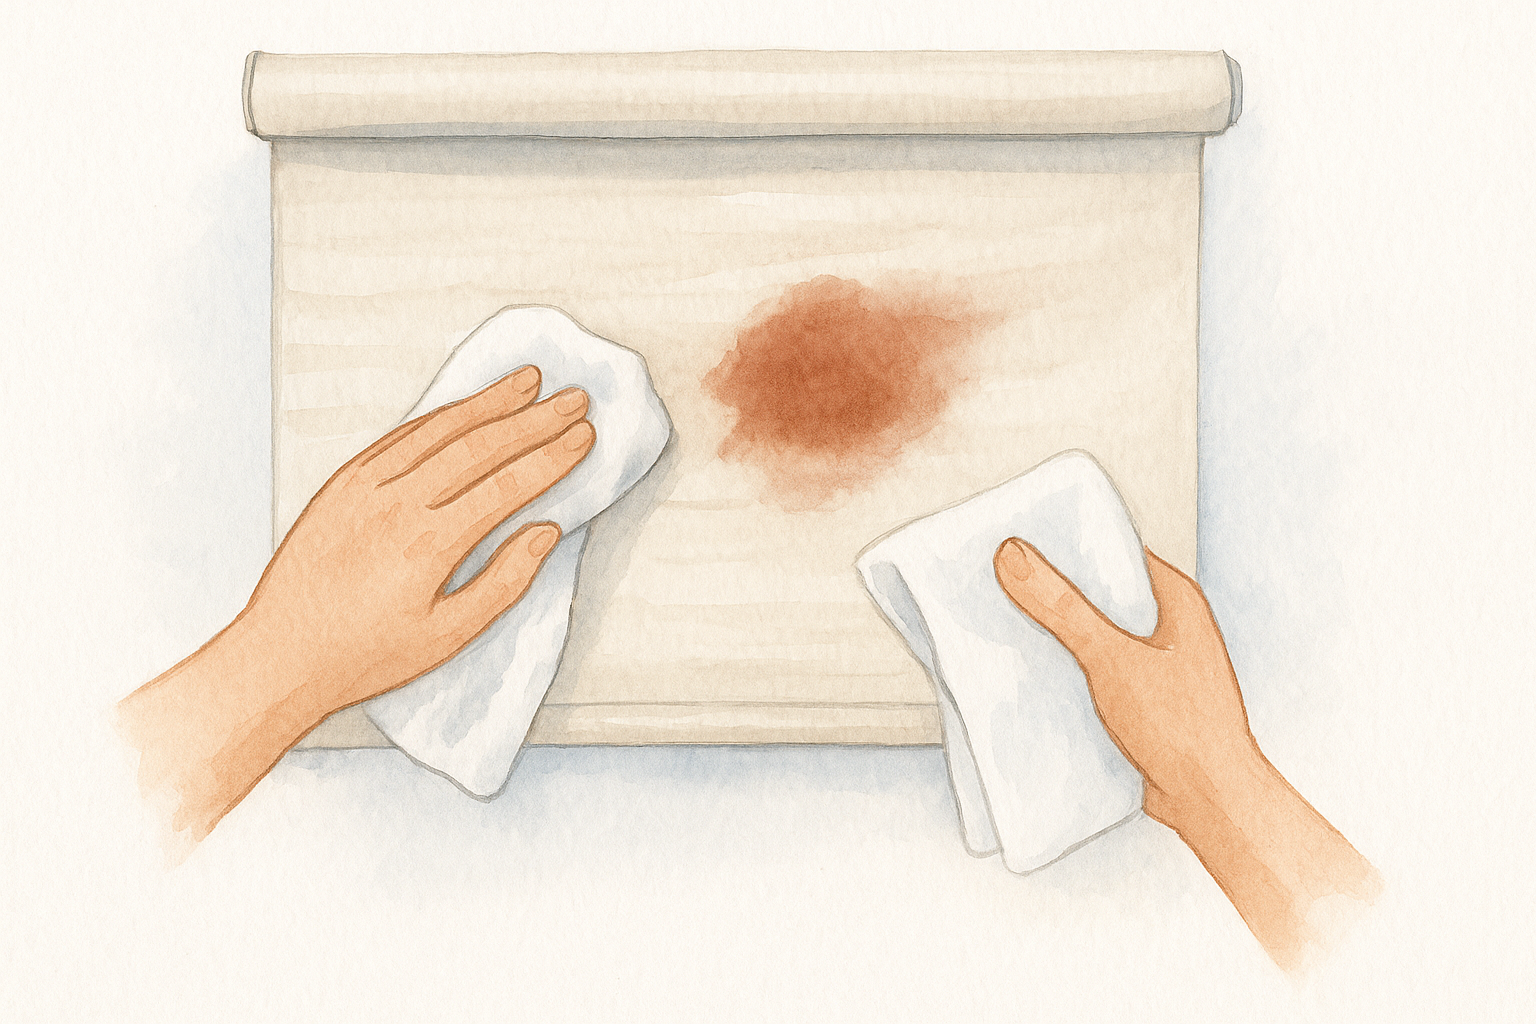
Stains are where most cleaning mistakes happen. The instinct to rub a stain immediately makes it worse by pushing the pigment or liquid deeper into the material. When you’re learning how to clean roller shades, the rule is simple: blot, never scrub.
Blotting lifts the stain out; scrubbing pushes it further in.
How to treat a stain without making it worse
Start with a clean white cloth dampened in your mild soap solution (a few drops of dish soap mixed into lukewarm water). Press the cloth gently onto the stain and lift straight up rather than dragging it across the surface. Work from the outer edge of the stain inward to keep it from spreading outward.
Follow these steps in order for any fresh stain:
- Blot excess liquid immediately with a dry cloth.
- Apply your soap solution to a clean cloth, not directly to the shade.
- Press and lift the stain in small sections.
- Rinse the area with a second cloth dampened in plain water.
- Blot dry with a fresh dry cloth.
For grease-based stains on vinyl shades, a small amount of rubbing alcohol on a cotton pad works well. Test it on a hidden corner first before treating the visible area.
Step 4. Handle deeper cleaning and drying correctly
Some stains and buildup won’t respond to spot cleaning alone. When that happens, vinyl and solar shades can handle a more thorough wash, while fabric shades need careful handling to avoid shrinking or losing their shape. Knowing when and how to clean roller shades more aggressively prevents you from causing damage that can’t be reversed.
When to remove the shade for a full wash
If your vinyl or solar shade has widespread grime, take it off the roller bracket and lay it flat on a clean surface or in a bathtub. Wipe the full surface with your mild soap solution using a soft cloth, working in long, even strokes from top to bottom.
Never soak a fabric shade or a blackout shade in water, as the backing layer will separate from the material.
Drying without warping
Hang the shade flat or rehang it on the bracket immediately after cleaning so it dries in its natural position. Never fold a wet shade or bunch it up, because creases can set permanently into the material. Direct sunlight or a heat source speeds up drying but can warp vinyl and fade fabric, so air dry in a shaded, well-ventilated space instead.
Wrap up and keep them looking new
Cleaning roller shades doesn’t have to be complicated, but every step works better when you start with the right material check. Identify your shade type first, work through dry dust removal before introducing any liquid, and always blot stains rather than scrubbing them out. Following this order prevents most of the accidental damage homeowners cause when they rush straight to a cleaning product.
Consistency matters more than intensity when it comes to ongoing maintenance. A quick weekly dusting stops grime from hardening into something that requires aggressive treatment. Regular light upkeep extends the life of both vinyl and fabric shades noticeably and protects the investment you made in your window treatments.
When your shades are worn beyond cleaning or you’re ready for something new, reach out to The Shutter Look for a free in-home consultation and professional installation across Central Florida. With over 23 years of experience, we help you find the right window treatments for your home and budget.
