


Getting your shade measurements wrong by even a quarter inch can mean gaps that let light bleed through, brackets that don’t fit, or a return process that eats up your time and money. Knowing how to measure windows for shades correctly is the single most important step before you place an order. Yet it’s also where most homeowners trip up, especially when choosing between an inside mount and an outside mount.
At The Shutter Look, we’ve spent over 23 years measuring and installing custom window treatments across Central Florida. We’ve seen every measurement mistake in the book, and we know exactly what causes them. That hands-on experience is what this guide draws from, real problems we’ve encountered and the precise techniques we use on every project.
Below, you’ll find step-by-step instructions for both inside and outside mount shades, along with tips to avoid common sizing errors and get a fit that looks and functions exactly the way it should. Whether you’re tackling this yourself or just want to understand the process before scheduling a free in-home estimate with our team, this guide has you covered.
What you need before you measure
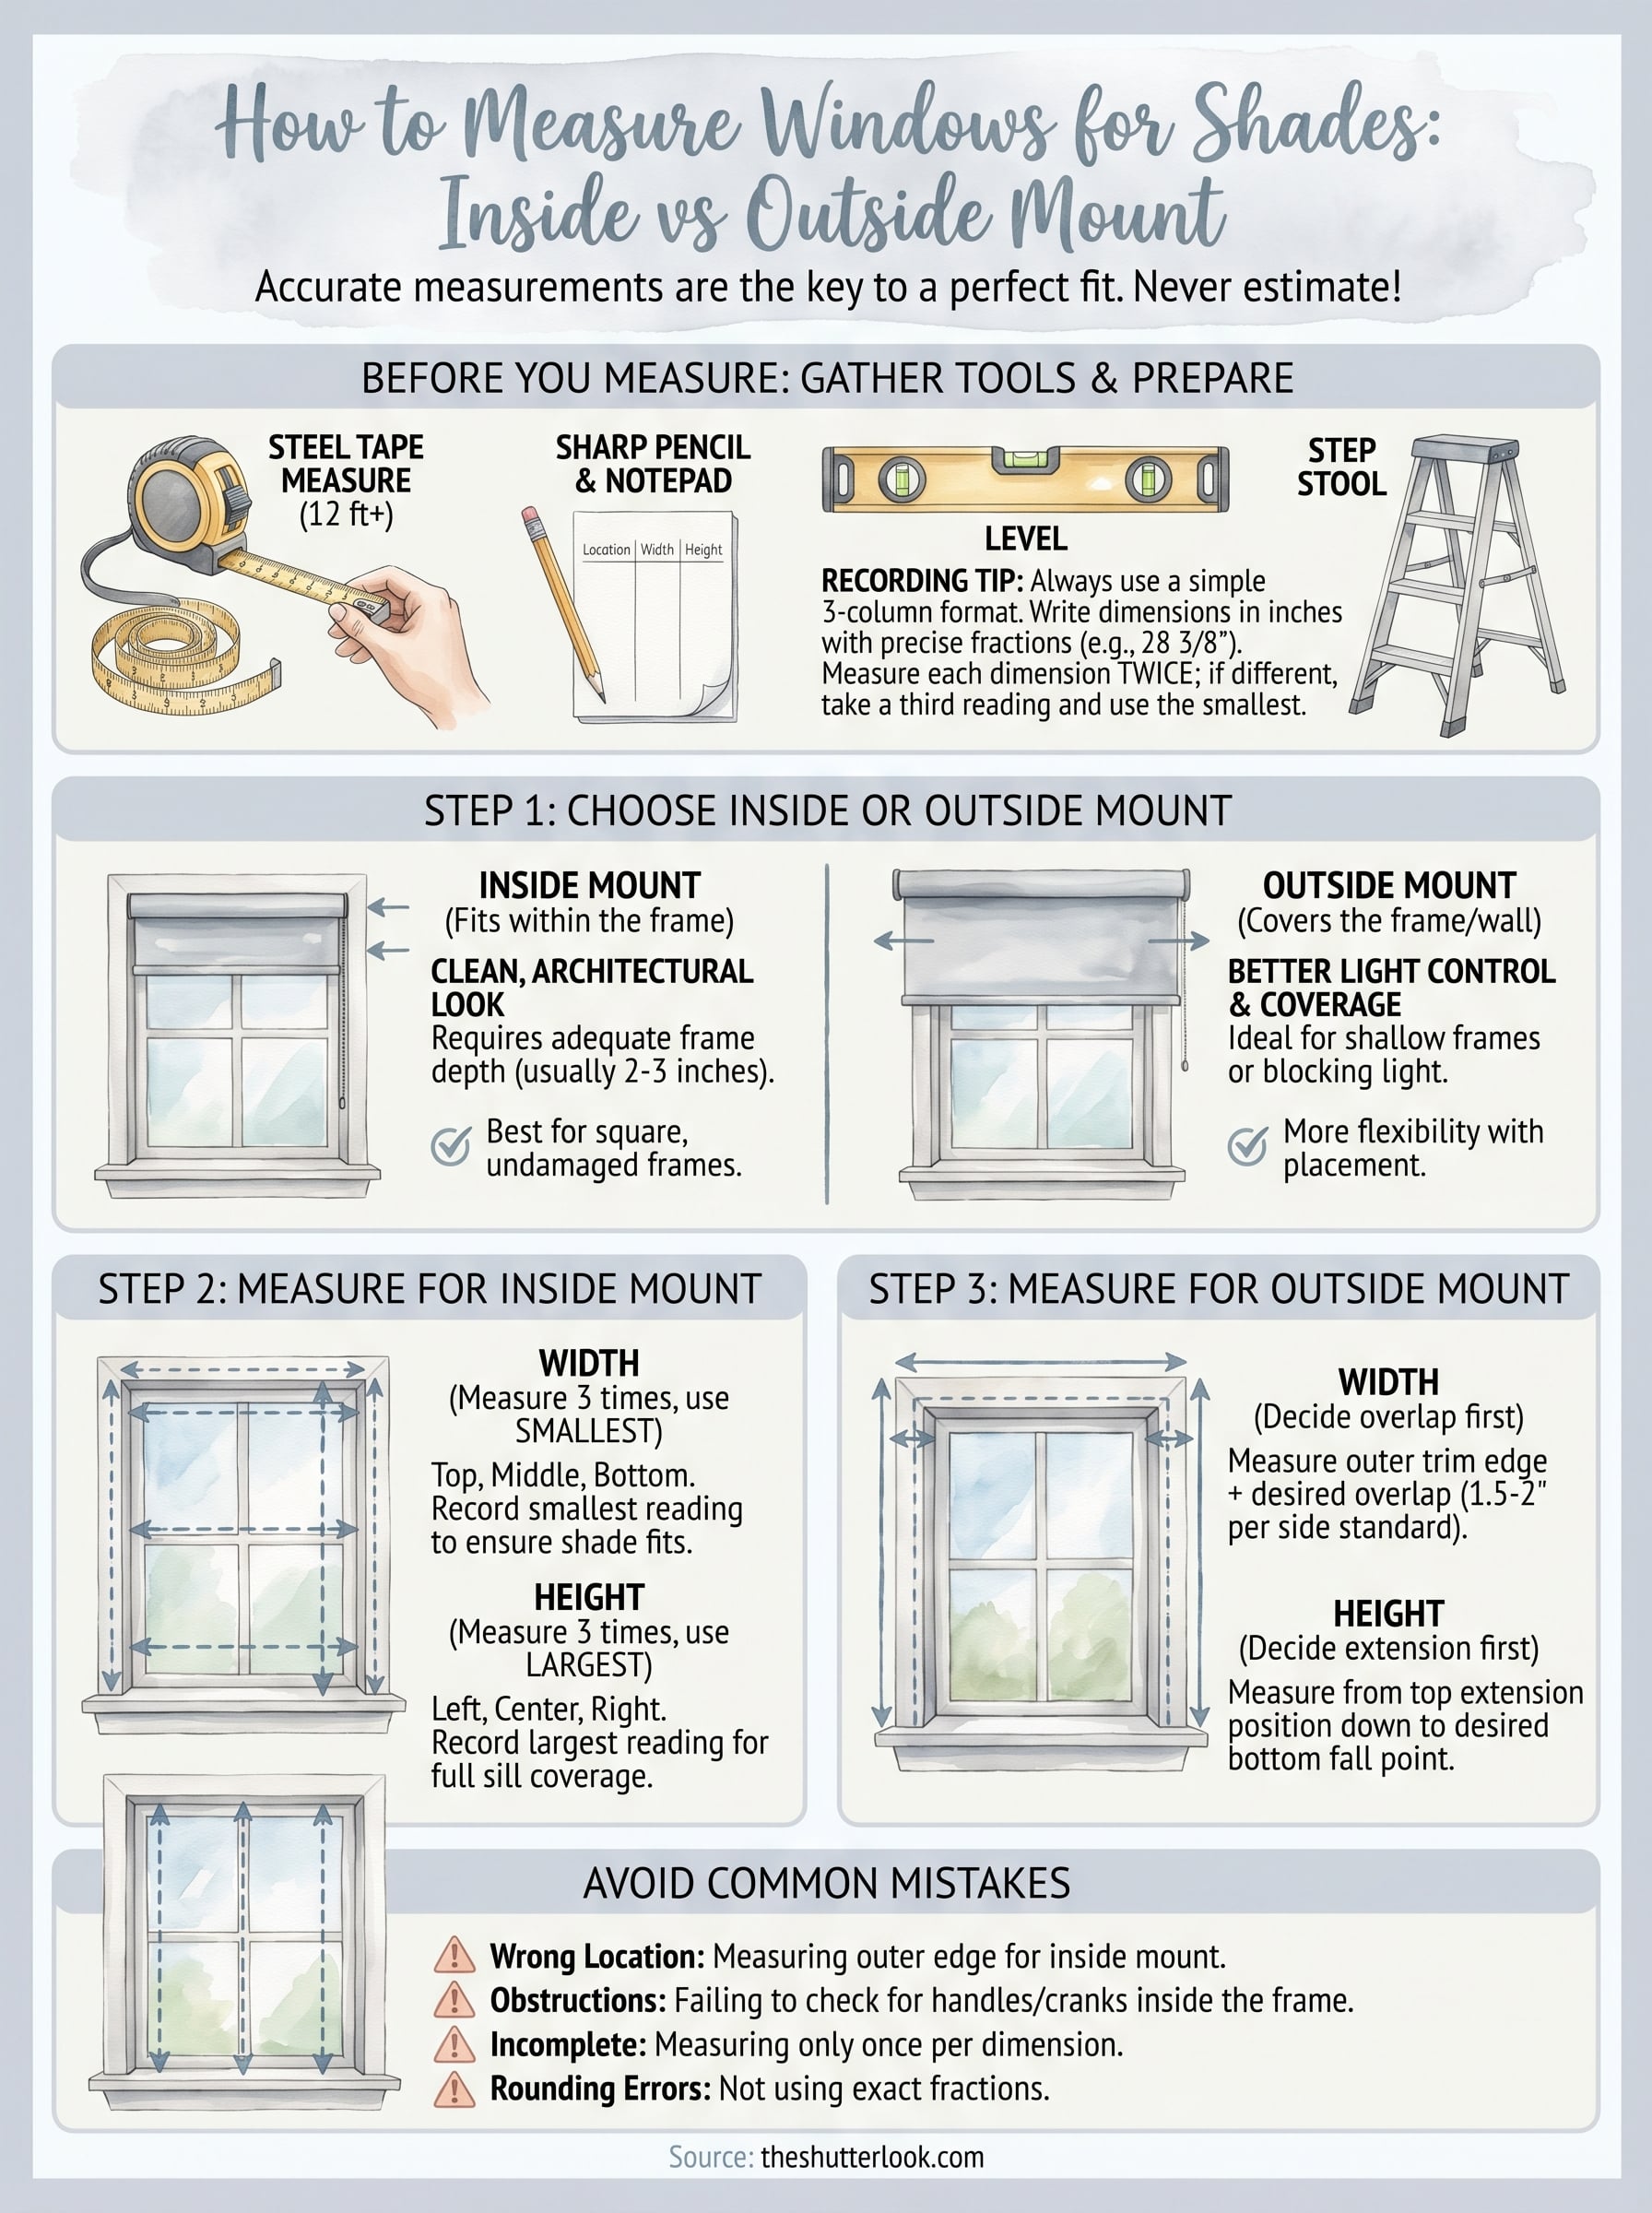
Before you learn how to measure windows for shades, you need to gather the right equipment. Walking up to a window with a fabric tape measure or a ruler borrowed from a desk drawer will almost certainly produce inaccurate numbers. Precision tools and a consistent recording method are what separate a measurement that works from one that sends you back to square one. Spending five minutes getting set up properly here will save you significant time and money later.
The tools you need
Your single most important tool is a steel tape measure that’s at least 12 feet long. Fabric and plastic tape measures flex and stretch, which introduces error even across a small window opening. You also need a sharp pencil for marking reference points and a notepad or phone for recording your numbers. A level is worth grabbing too, since window frames in older Florida homes can sit slightly off-square, which affects how your shade fits and hangs.
A quarter-inch error repeated across three windows adds up fast, so never estimate or eyeball a measurement.
Here’s what to have ready before you start:
- Steel tape measure (12 ft. minimum)
- Pencil and notepad (or a notes app on your phone)
- Level to check if your frame sits straight
- Step stool or ladder if your windows sit above shoulder height
- Good lighting so you can read the tape blade clearly
How to record your measurements
Writing down your numbers correctly is just as important as taking them accurately. Use a simple three-column format that includes the window location, width, and height for every window you measure. Label each one by room and position, for example "Living Room Left" or "Master Bedroom South," so there’s no confusion when you go to place your order.
Your notes should follow this structure:
| Window Location | Width | Height |
|---|---|---|
| Living Room Left | 28 3/8" | 54 1/4" |
| Bedroom North | 36 1/2" | 60 3/4" |
| Kitchen Right | 24 1/8" | 48 1/2" |
Always write measurements in inches with the fraction included. Shades are ordered to the nearest 1/8 inch, so rounding to the nearest half inch will cost you a precise fit. Take each measurement at least twice before you accept the number as final. If your two readings differ, take a third and use the smallest number, since it’s easier to add a small gap than to force a shade into a frame that’s too tight.
Step 1. Choose inside or outside mount first
Before you take a single measurement, you need to decide which mount type you want. This decision changes every dimension you record, which is why skipping it leads to wrong numbers and ill-fitting shades. Your mount choice depends on your window’s depth, its frame condition, and the look you want to achieve.
Inside mount
An inside mount positions the shade inside the window frame so it sits flush with the wall. For this to work, your window frame needs enough depth to hold the headrail and mounting brackets without obstruction. Most shades require at least 2 to 3 inches of clear depth, though you should always check the specific product spec sheet for the shade you plan to order.
Measure the depth of your window frame with your steel tape measure before committing to an inside mount.
Inside mounts look clean and architectural, and they let the frame itself act as a visual border. They work best when your window frame is square and undamaged.
Outside mount
An outside mount attaches the shade to the wall or trim above and outside the window opening. This option works well when your frame is too shallow, when you want to cover a wider area for better light control, or when you need to make a window appear larger than it is. Knowing how to measure windows for shades with an outside mount requires you to decide on your overlap and height extensions before you write down a single number.
Outside mounts give you more flexibility with coverage and placement, which makes them a strong choice for rooms where blocking light fully is the priority.
Step 2. Measure for an inside mount shade
Once you’ve confirmed your window frame has sufficient depth, you’re ready to take the actual measurements. Knowing how to measure windows for shades for an inside mount means recording the exact opening, not the frame’s outer edge. You’ll take three width readings and three height readings, then apply a specific rule to each before submitting your order.
Measure the width
Start at the top of the window opening and measure from the inside left edge of the frame to the inside right edge. Then take the same measurement at the middle and at the bottom of the opening. Write down all three numbers before moving on.
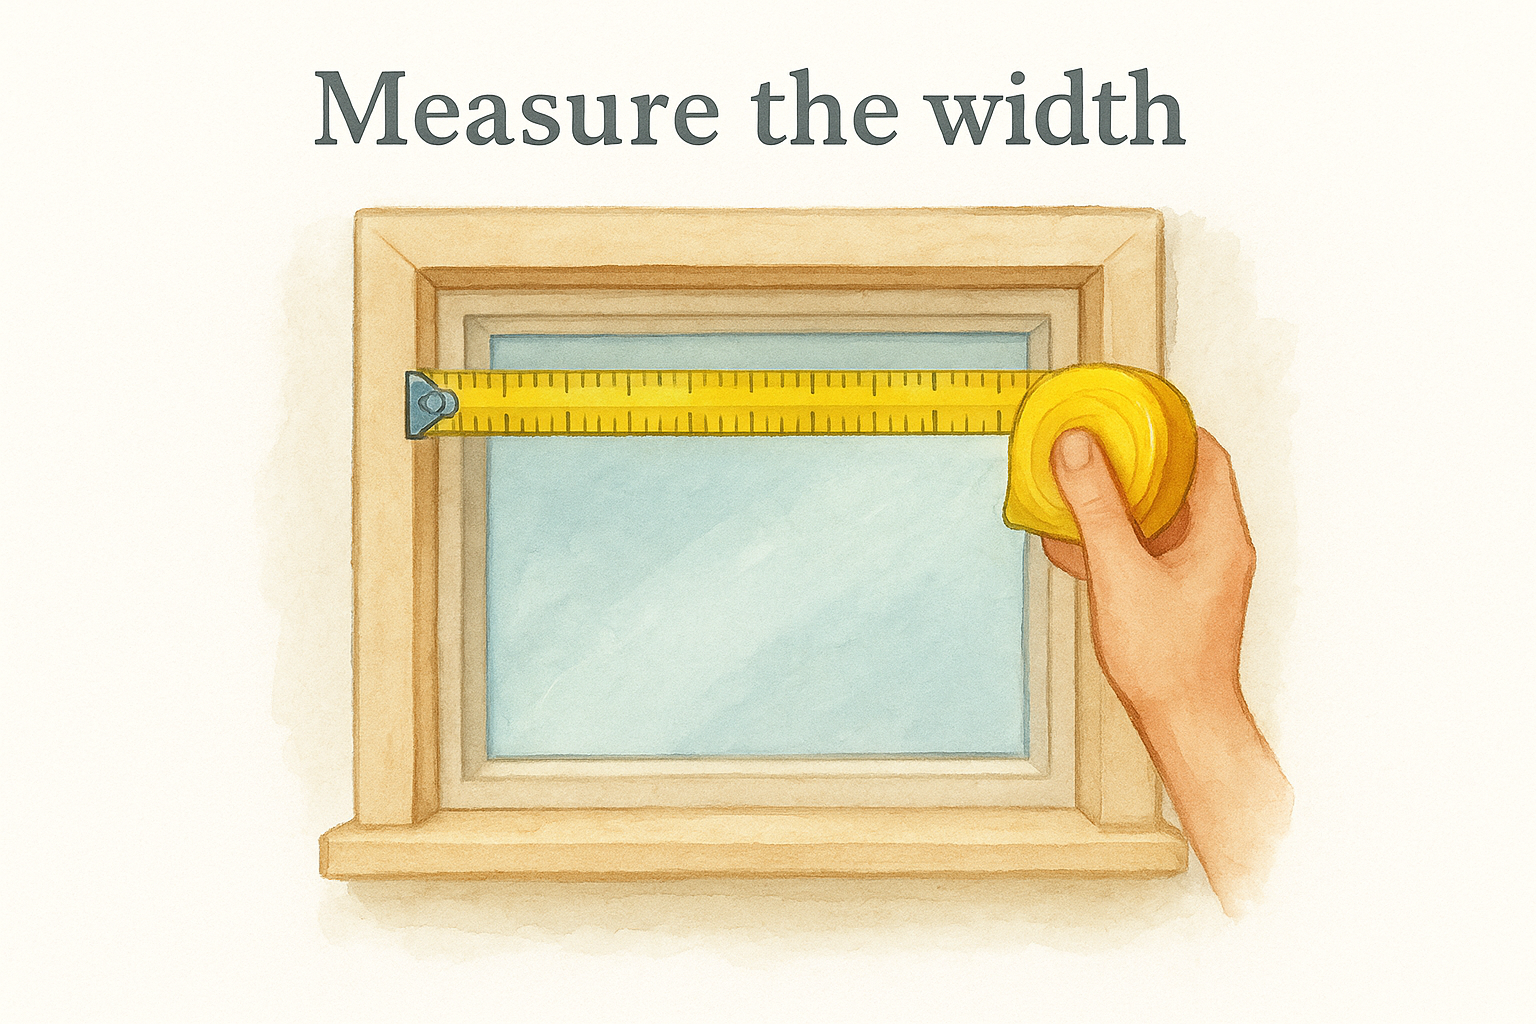
Always use the smallest of your three width readings, since shade manufacturers will deduct a small clearance allowance, and starting with the smallest number ensures the shade fits without forcing.
Use this recording template for inside mount width:
| Position | Width Reading |
|---|---|
| Top | 36 1/4" |
| Middle | 36 3/8" |
| Bottom | 36 1/8" |
| Use this number | 36 1/8" |
Measure the height
Run your tape measure from the top inside edge of the frame straight down to the window sill. Take three readings: one on the left side, one in the center, and one on the right. Unlike width, you use the largest height measurement for an inside mount so the shade reaches the sill without leaving a gap at the bottom.
Record your height readings in the same table format, marking the largest number clearly. Submit your measurements exactly as recorded, without adding or subtracting anything extra, since the manufacturer applies standard clearance deductions automatically on their end.
Step 3. Measure for an outside mount shade
Outside mount measurements work differently because you’re defining the shade’s final installed size, not recording the raw window opening. Before you write down a single number, you need to decide how far beyond the frame you want the shade to extend on each side and how high above the opening you want the headrail to sit. These decisions determine your final width and height, so make them before you touch the tape measure.
Determine your overlap and extension
For an outside mount, the industry standard overlap on each side is 1.5 to 2 inches past the frame edge, which is enough to block light seeping in at the sides. For the top, most installers place the headrail 2 to 4 inches above the frame to hide the bracket hardware and prevent light from coming through above the shade. Decide on your specific numbers and write them down before measuring so you apply them consistently across every window.
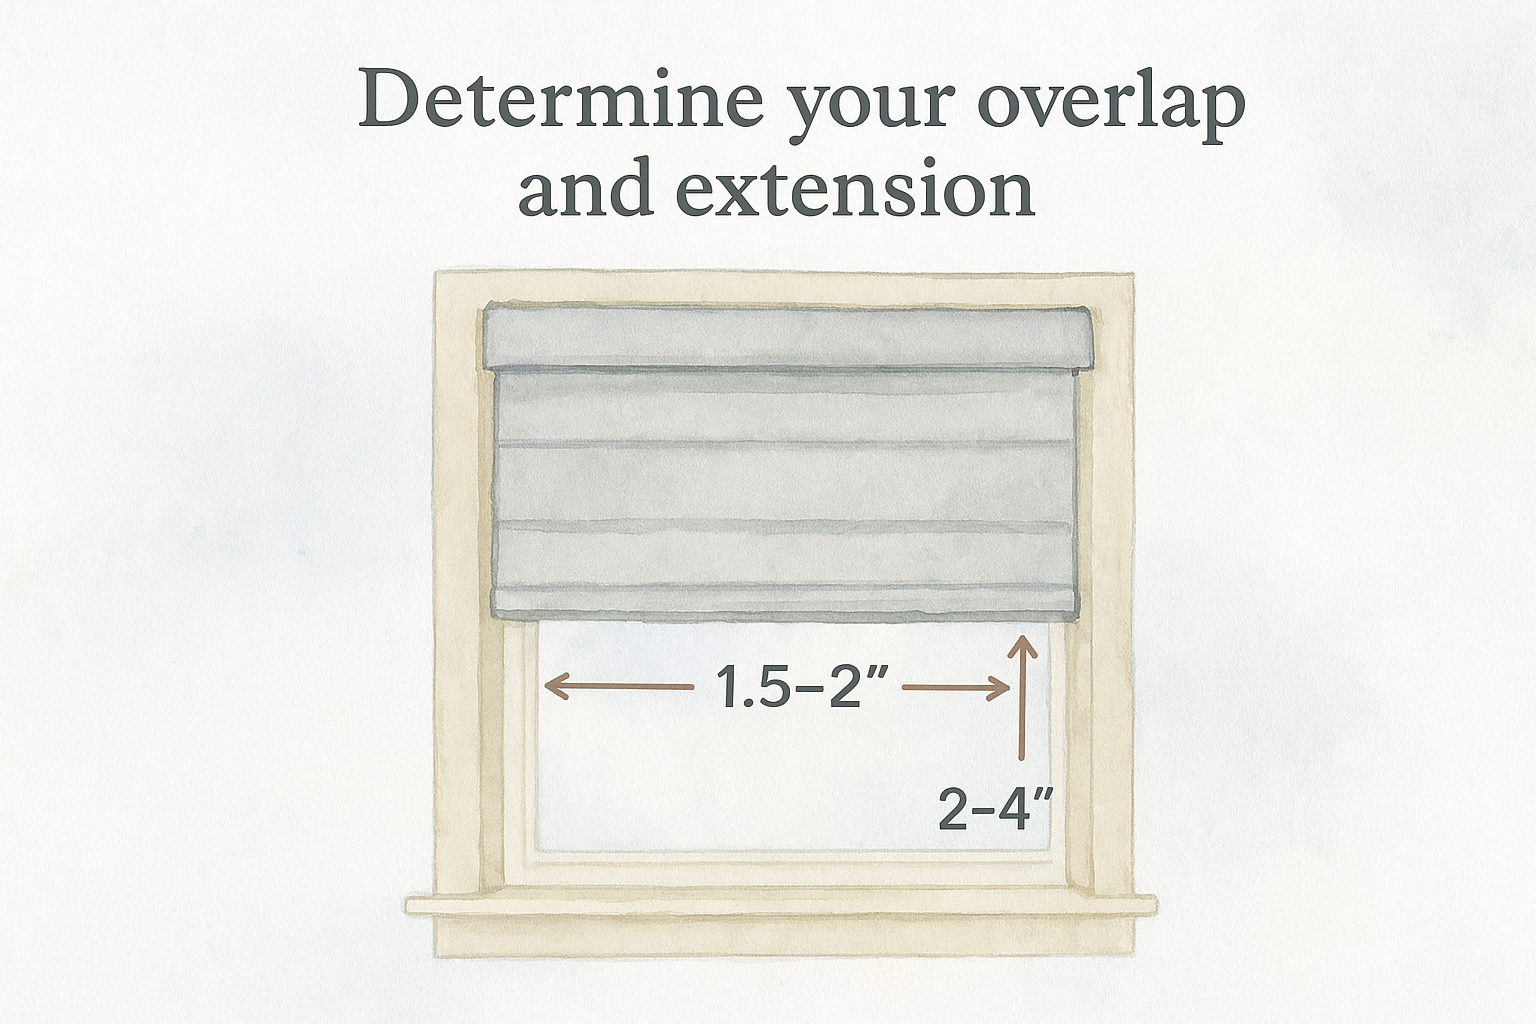
Choosing a larger overlap on windows that face east or west is worth it if morning or afternoon light is a problem in that room.
Measure the width and height
Once you’ve settled on your overlap and placement, you can record your measurements accurately. For width, measure the full outer edge of the left trim to the outer edge of the right trim, then add your chosen overlap to both sides. For height, measure from where the top of the headrail will sit down to where you want the shade to fall, typically 0.5 inches below the sill.
Use this template to track your outside mount figures before ordering:
| Measurement | Raw Reading | Add Overlap | Final Number |
|---|---|---|---|
| Width | 36 1/4" | +3" (1.5" per side) | 39 1/4" |
| Height | 58 1/2" | +3" (top extension) | 61 1/2" |
Knowing how to measure windows for shades for an outside mount comes down to committing to your overlap values first and then recording the raw window dimensions second.
Step 4. Fix common measuring mistakes and obstacles
Even with the right tools and a clear process, specific errors show up repeatedly when homeowners learn how to measure windows for shades. Catching these mistakes before you submit your order saves you from a second round of measuring and a longer wait for replacement shades. A few minutes of double-checking now prevents weeks of delays later.
The most common measuring errors
The single biggest mistake is measuring in the wrong location. For inside mounts, many homeowners measure the outer frame edge instead of the inner opening, which produces a number that’s too wide by an inch or more. Another frequent error is failing to check for obstructions inside the frame, such as window handles, locks, or casement cranks that sit within the opening and prevent the headrail from fitting flush.
Always inspect the full interior depth of your frame for hardware obstructions before finalizing any inside mount order.
Watch for these errors on every window you measure:
- Measuring only once instead of taking three readings at the top, middle, and bottom
- Rounding to the nearest half inch instead of recording the exact fraction
- Swapping width and height when entering your numbers into an order form
- Using a kinked or stretched tape measure that introduces subtle inaccuracies across longer spans
Obstacles that affect your measurements
Some windows present physical challenges that directly change how you record your readings. Casement windows with protruding handles require you to measure the usable clear space inside the frame rather than the raw opening, since the handle path determines how far the shade can extend down.
Bay windows and angled frames need each panel measured independently, treating every flat section as its own separate window rather than combining them into one number.
Ready to order with confidence
You now have everything you need to handle how to measure windows for shades from start to finish. You know which tools to use, how to choose between inside and outside mount, how to take three readings per dimension, and how to spot the mistakes that cause orders to come back wrong. Accurate measurements are the foundation of a shade that fits cleanly, blocks light the way you want, and lasts for years without sagging or warping.
Working through these steps carefully the first time means no return shipping, no waiting an extra three weeks for a replacement, and no gaps along the frame edge that let sunlight in. If you’d rather have a professional handle the process for you, The Shutter Look has been measuring and installing custom window treatments across Central Florida for over 23 years. Schedule your free in-home estimate and get shades that fit right the first time.
