


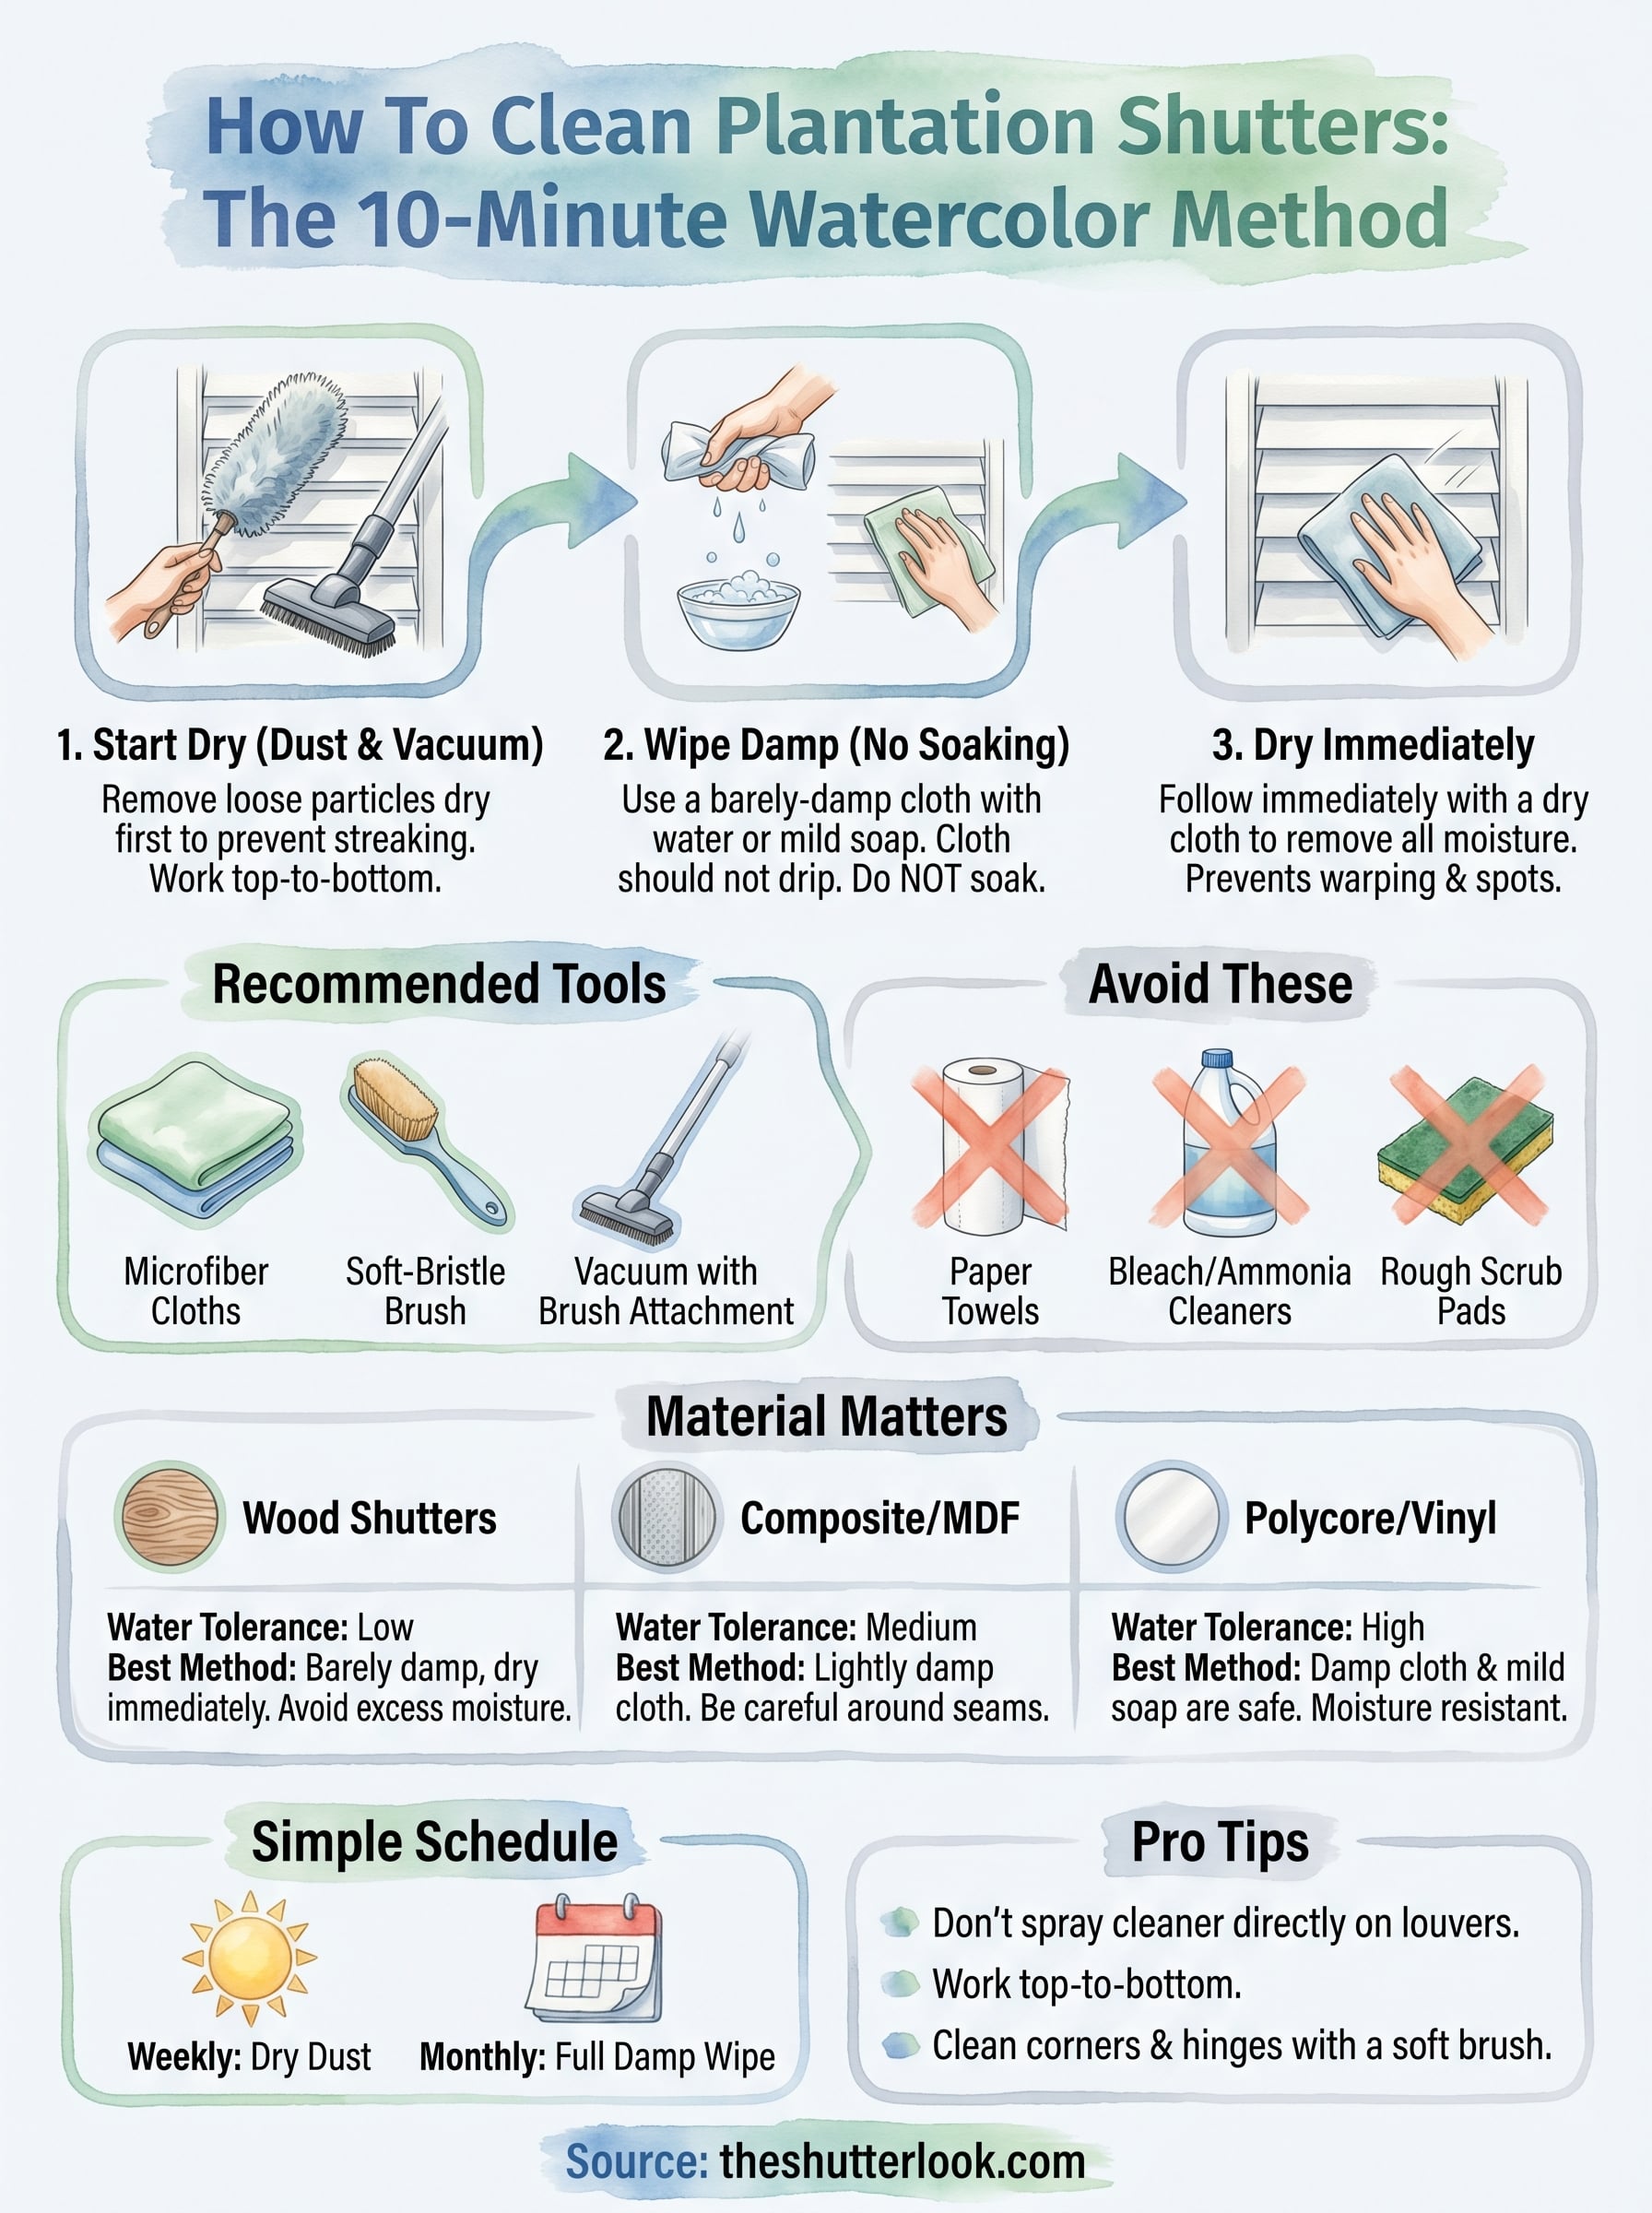
Plantation shutters are built to last, but only if you take care of them. Dust, fingerprints, and grime build up faster than most people realize, and knowing how to clean plantation shutters the right way makes the difference between treatments that look brand new for decades and ones that yellow or warp within a few years. The good news? It takes about 10 minutes once you have a simple routine down.
At The Shutter Look, we’ve spent over 23 years installing shutters across Central Florida homes. That means we’ve seen every cleaning mistake in the book, from harsh chemicals that strip finishes to pressure washing attempts that warp louvers. We’ve also seen homeowners keep their shutters spotless with almost zero effort, simply because they followed the right method from day one.
This guide breaks down our recommended cleaning process step by step, covers the tools you actually need (and the ones you don’t), and explains how to handle stubborn buildup without risking damage. Whether you have Polycore, wood, or composite shutters, you’ll walk away with a clear routine that keeps your window treatments looking sharp year after year.
What you need before you start
Gathering the right supplies before you start saves time and prevents damage. Most of what you need is already in your home, and knowing what to avoid is just as important as knowing what to grab. Using the wrong tool, like a rough scrub pad or a soaking-wet cloth, can scratch the finish or cause warping, especially on wood shutters.
The right cleaning tools
You don’t need a specialty kit to get your shutters clean. A few basic household items handle most jobs without any risk to the finish or louvers. Here’s what to have on hand before you start:
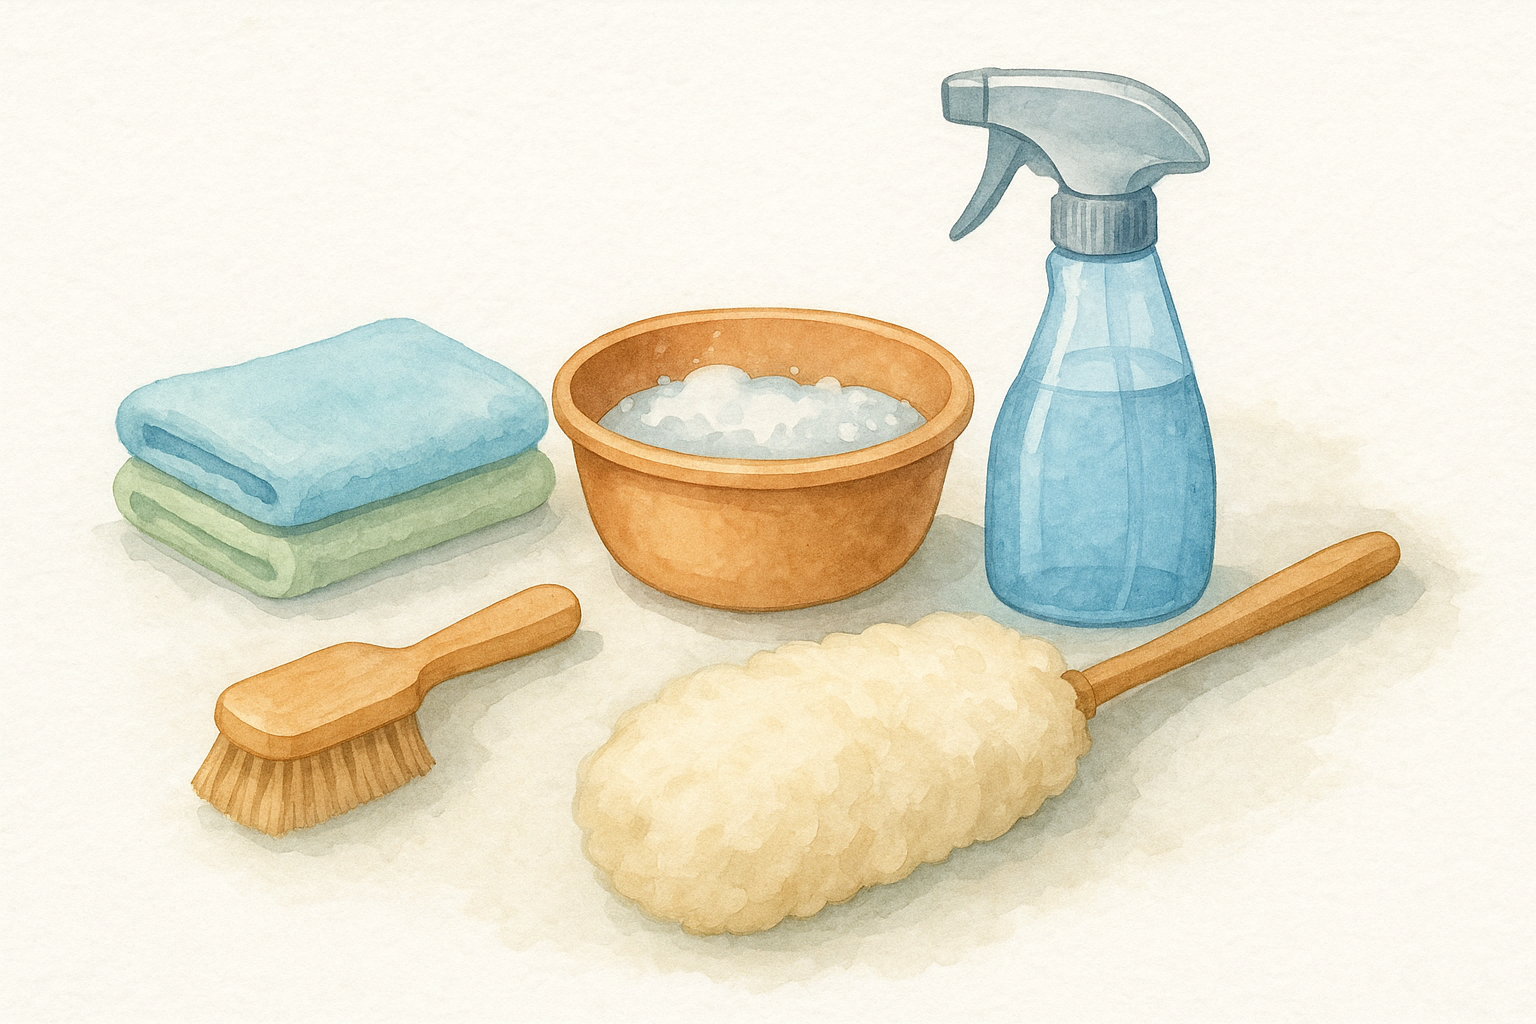
- Microfiber cloths (2 to 3, one for dry dusting and one for damp wiping)
- A soft-bristle brush or a clean, dry paintbrush for working into corners and hinge areas
- A vacuum cleaner with a brush attachment for pulling dust off louvers quickly without spreading it around
- A lambswool or dry duster for quick weekly passes between deeper cleans
- A small bucket or bowl to mix your cleaning solution
Avoid paper towels entirely. They scratch the surface of the louvers and leave lint behind, which defeats the purpose of cleaning. Old cotton T-shirts cut into rags also work well if you don’t have microfiber cloths on hand.
The right cleaning solution
The type of solution you use depends on what you’re dealing with. For routine dust and light grime, plain warm water works fine. For tougher spots, a small amount of mild dish soap mixed with warm water is your best option. Mix about one teaspoon of soap per cup of warm water, and that’s all you need.
Never use bleach, ammonia-based cleaners, or abrasive spray products on plantation shutters. These strip the finish, cause discoloration, and can break down the material over time, regardless of whether your shutters are wood, composite, or Polycore.
Stay away from furniture polish, wax sprays, and silicone-based products too. These leave a residue that attracts more dust and can make the surface feel tacky over time.
Know your shutter material first
Before you figure out how to clean plantation shutters properly, you need to know what your shutters are made of. The material determines how much moisture they can handle and which products are safe to use on them.
| Material | Water Tolerance | Best Cleaning Method |
|---|---|---|
| Wood | Low | Barely damp cloth, dry immediately |
| Composite / MDF | Medium | Lightly damp cloth, avoid seams |
| Polycore (PVC) | High | Damp cloth, mild soap safe to use |
| Vinyl | High | Damp cloth, mild soap safe to use |
Polycore shutters, like the Sunland Polycore models we install at The Shutter Look, are the most forgiving because they’re moisture-resistant by design. Wood shutters require the most care since excess water causes warping and can lift the paint or stain. If you’re unsure what material you have, check your original installation paperwork or call whoever installed them. Knowing this upfront prevents costly mistakes before you’ve even picked up a cloth.
Step 1. Dust and vacuum the slats
Dusting comes first, and it’s the most important part of learning how to clean plantation shutters without spreading grime around or grinding dust particles into the finish. If you skip this step and go straight to a damp cloth, you’ll drag loose dust across the louvers and create streaks that are harder to remove than the original buildup. Starting dry saves you extra work in the next step and protects your shutter material from unnecessary moisture contact.
Dust the louvers by hand
Start with your dry microfiber cloth or lambswool duster, and work from the top of the shutter panel down to the bottom. Hold each louver steady with one hand as you wipe with the other so you’re not putting pressure on the tilt rod or bending the slat out of position. Work in short, light strokes across each louver rather than pressing down hard. This keeps dust from embedding into the painted or stained surface.
Tilt all your louvers to one side first, wipe the exposed face of every slat, then tilt them the other direction and wipe again. You’ll cover both sides without constantly repositioning yourself.
Make sure you reach into the corner where each louver meets the frame on both sides of the panel. That junction collects dust fast, and most people miss it on every pass. A clean, dry paintbrush works well here if your cloth can’t fit into the narrow gap between the louver edge and the frame.
Vacuum the slats for faster cleanup
Once you’ve knocked the loose dust off by hand, run your vacuum’s brush attachment across each louver to pull up anything still sitting on the surface. Set your vacuum to low or medium suction so you’re not flexing the slats or pulling them out of alignment. Hold the attachment flat against each louver and move it slowly from one side to the other.
Work in the same top-to-bottom order you used when dusting. This approach works especially well when your shutters haven’t been cleaned in a while and there’s a visible layer of buildup on the louvers. For a quick routine clean, the hand dusting alone might be enough. For anything with noticeable accumulation, the vacuum step removes what the cloth leaves behind and cuts down on how much wiping you need to do next.
Step 2. Wipe down without soaking the finish
Once the loose dust is gone, you move into the damp wipe phase. This is where most people go wrong when figuring out how to clean plantation shutters, because they assume wetter means cleaner. It doesn’t. Excess moisture is the main cause of warping, finish bubbling, and joint separation, especially on wood and composite shutters. Your goal here is a cloth that’s damp, not dripping.
Prep your cloth correctly
Dip one of your microfiber cloths into your warm water or mild soap solution, then wring it out thoroughly until no water drips when you squeeze it. The cloth should feel slightly cool and damp to the touch, nothing more. A good test: press it against the back of your hand. If it leaves a wet mark that stays visible for more than a few seconds, it’s still too wet. Wring it out again before touching any louver.
The tighter you wring the cloth, the safer you are. A cloth that’s too dry just won’t lift grime effectively, but a cloth that’s too wet can damage your shutters in a single pass.
Wipe each louver with a controlled motion
Starting at the top panel and working downward, lay the cloth flat against each louver and pull it from one end to the other in a single, smooth stroke. Don’t scrub back and forth, and don’t press hard into the surface. One steady pass with light, even pressure picks up grime without scratching the finish or flexing the slat.
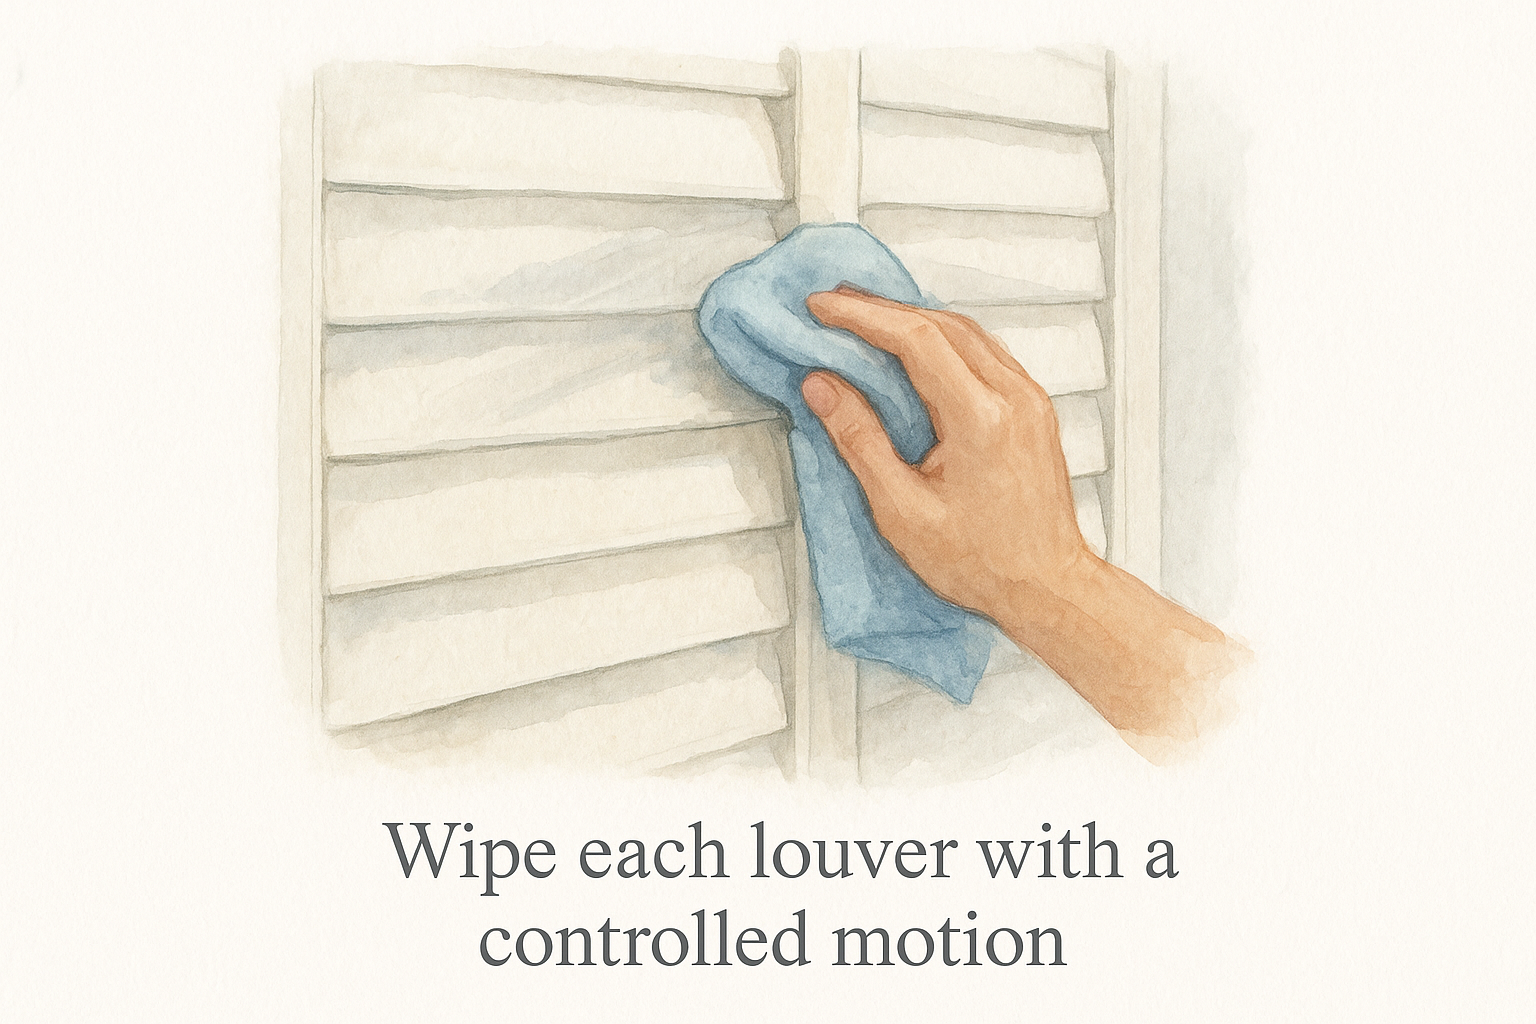
For the tilt rod running down the center of the panel, wrap the cloth around it lightly and wipe from top to bottom in one motion. This area collects more fingerprints and oils than most people expect, so don’t skip it.
Dry the surface immediately
After each louver gets its damp wipe, follow up right away with your second dry microfiber cloth. Don’t let moisture sit on the surface, even for a minute. On wood shutters especially, standing moisture soaks into the finish fast. On Polycore or vinyl shutters it’s less critical, but drying right away still prevents water spots and streaks that leave your shutters looking dull rather than clean.
Work the same top-to-bottom order for drying that you used for wiping so you never miss a slat.
Step 3. Remove grease, fingerprints, and mildew
Routine dusting and damp wiping handle most everyday dirt, but grease, fingerprints, and mildew require a more targeted approach. These types of buildup sit differently on the surface and won’t lift with a barely-damp cloth alone. Understanding how to clean plantation shutters when you’re dealing with stubborn residue keeps you from scrubbing harder than necessary and risking finish damage in the process.
Tackle grease and fingerprints
Grease from cooking and skin oils from fingerprints bond to the shutter surface in a way that plain water can’t break down on its own. For these spots, slightly increase the dish soap concentration in your solution to about two teaspoons per cup of warm water. Apply the solution to a microfiber cloth, not directly to the louver, and press the cloth flat against the affected area for three to five seconds before wiping. This brief contact time gives the soap a chance to lift the grease without requiring aggressive scrubbing.
Work the spot in short, straight strokes following the direction of the louver, then follow immediately with a dry cloth. Repeat once if the spot remains. For shutters near the kitchen or any high-traffic areas your hands touch regularly, run through this targeted clean every two to three weeks rather than waiting for your monthly full clean.
Handle mildew safely
Mildew shows up as small grey or black spots, most commonly on shutters in bathrooms, laundry rooms, or any room with elevated humidity. Catching it early matters because mildew spreads and becomes significantly harder to remove the longer it sits on the surface without treatment.
Mix one part white vinegar with two parts warm water, apply the solution to a cloth, and press it against the mildew spot for about 30 seconds before wiping. This works on Polycore and vinyl shutters without damaging the finish.
For wood or composite shutters with mildew, use the same vinegar solution but dry the area immediately and thoroughly afterward. Avoid scrubbing in circles. Instead, lift and press the cloth so you’re pulling the mildew off the surface rather than spreading it sideways. If mildew keeps returning in the same spot, the underlying humidity problem in the room needs to be addressed, because treating only the shutter surface will not stop it from coming back.
How to keep shutters clean longer and avoid damage
Knowing how to clean plantation shutters is only half the equation. The other half is preventing heavy buildup from forming in the first place, which means building a few simple habits around frequency and environment. Shutters that get light attention every week stay clean with minimal effort, while ones that get ignored for months end up needing a full cleaning session every time and are more likely to develop permanent staining or finish damage along the way.
Set a simple cleaning schedule
A consistent schedule is the single most effective thing you can do to keep your shutters in good condition long-term. Run a dry microfiber cloth or lambswool duster across the louvers once a week, which takes about two minutes per window. Do a full damp-wipe cleaning once a month. If your shutters are in a kitchen, bathroom, or any high-traffic room, move the full damp wipe to every two weeks instead.
The more often you dust, the less grime bonds to the surface, and the easier your monthly cleaning becomes every single time.
Here’s a simple schedule to follow:
| Frequency | Task |
|---|---|
| Weekly | Dry dust all louvers with a microfiber cloth or duster |
| Monthly | Full damp wipe with warm water or mild soap solution |
| Every 2-3 weeks | Targeted spot clean for kitchens, bathrooms, or high-touch panels |
Control humidity and airflow
High humidity is the primary environmental factor that shortens the lifespan of plantation shutters, particularly wood and composite models. In bathrooms and laundry rooms, run your exhaust fan during and after showers to pull moisture out of the air before it settles on the louver surface. A portable dehumidifier in rooms that consistently run humid also makes a measurable difference in how quickly buildup returns between cleanings.
Keep shutters slightly open rather than fully closed in humid rooms when airflow allows. Closed louvers trap moisture between the slats and against the frame, which accelerates mildew growth and can cause wood to expand and warp over repeated exposure.
Habits that cause the most damage
Certain everyday habits quietly degrade your shutters faster than dust ever will. Spraying cleaning products directly onto the louvers, using rough cloths, and letting water pool in the frame after cleaning all cause long-term finish damage. Always apply any solution to your cloth first, never to the shutter itself, and always dry the surface immediately after any wet contact. A few common habits to stop right away:
- Spraying air fresheners or surface cleaners near open louvers
- Wiping with paper towels or rough rags
- Letting children or pets push the louvers out of position repeatedly without realigning them
- Leaving windows open during heavy rain with shutters in the closed position, which drives moisture directly into the frame
You’ve got this
Cleaning plantation shutters doesn’t require special equipment or a full afternoon. With a dry dusting pass once a week and a damp wipe-down once a month, your shutters stay in good shape with minimal effort. The core method for how to clean plantation shutters comes down to three things: start dry, use a barely-damp cloth, and dry the surface immediately after. Follow those steps consistently and you’ll avoid the most common mistakes that cause yellowing, warping, and finish damage over time. Your cleaning routine gets easier and faster the more often you do it.
Your shutters represent a real investment in your home, and a simple 10-minute routine protects that investment for years to come. If you’re thinking about adding new shutters or want advice on which materials hold up best in your specific rooms, get a free in-home estimate from The Shutter Look. We’ve been installing and advising Central Florida homeowners for over 23 years and we’re glad to help you find the right fit.
